A common practice in web development: Outsourcing
Many site owners hire external web agencies to develop their website. In such cases, these site owners need to give access to their Plesk Panel and account to allow the agency to take key actions within the Panel. The most obvious and easy way of doing this is to share with them your access credentials. But stop right there! This is NOT A SECURE way to solve this task!
Luckily, Plesk has the solution. As you may know, for several years Plesk has been offering the functionality of ‘additional users’, which allows you to share such access in a secure way. Let’s take a closer look:
Step-by-step Guide to Sharing Access Securely
1. Go to ‘Additional Users’
The ‘Additional users’ functionality is easy to find in the two different Plesk views:
In Power User view (mostly used by Web Agencies and individual server owners):
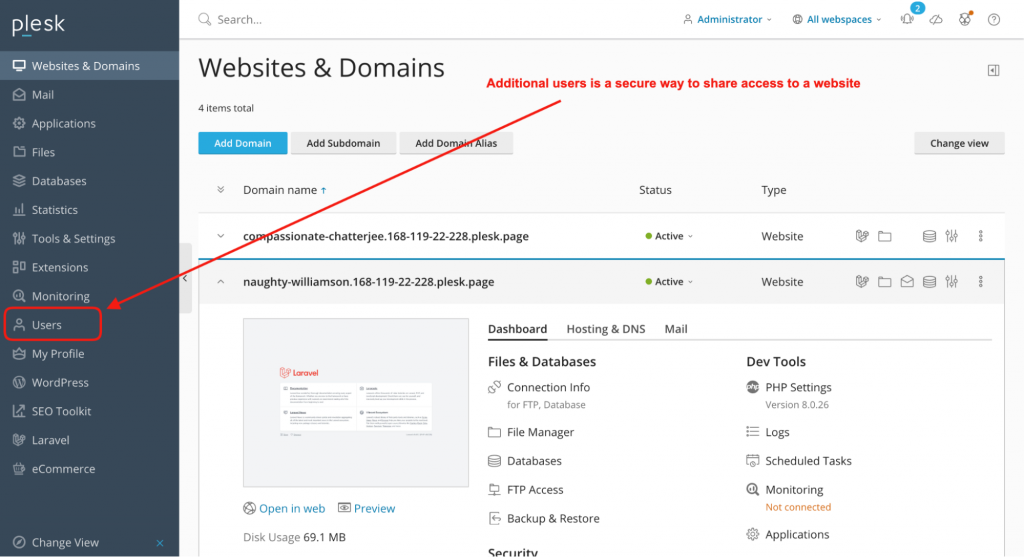
In Shared Hosting (aka. Service Provider, mostly used by Hosting providers, who offer classic shared hosting) view, you can find the additional user account in the settings for particular subscriptions.
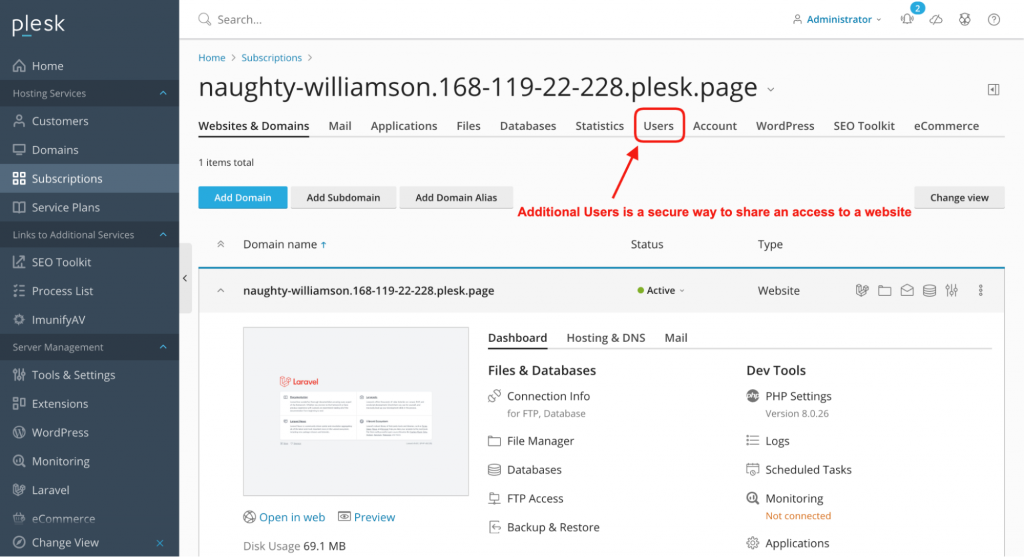
To begin, enter the ‘Users’ tab to create a new (additional) user.
2. Choose which website(s) (Subscriptions) the New User can access
Once you have clicked the ‘Users’ tab of your Plesk panel, you can create a user account as seen in the screenshot below. Using the ‘Access to subscriptions’ field, you can grant access to a particular subscription, or to all your subscriptions, depending on the purpose.
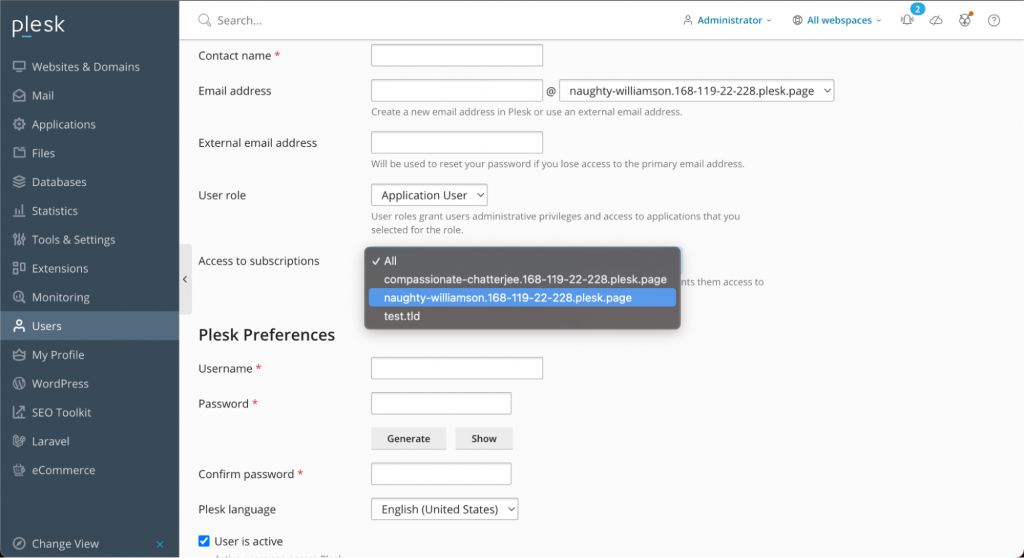
3. Select User Roles
You can also specify a role for the new user. The role defines which permissions will be given to the user.
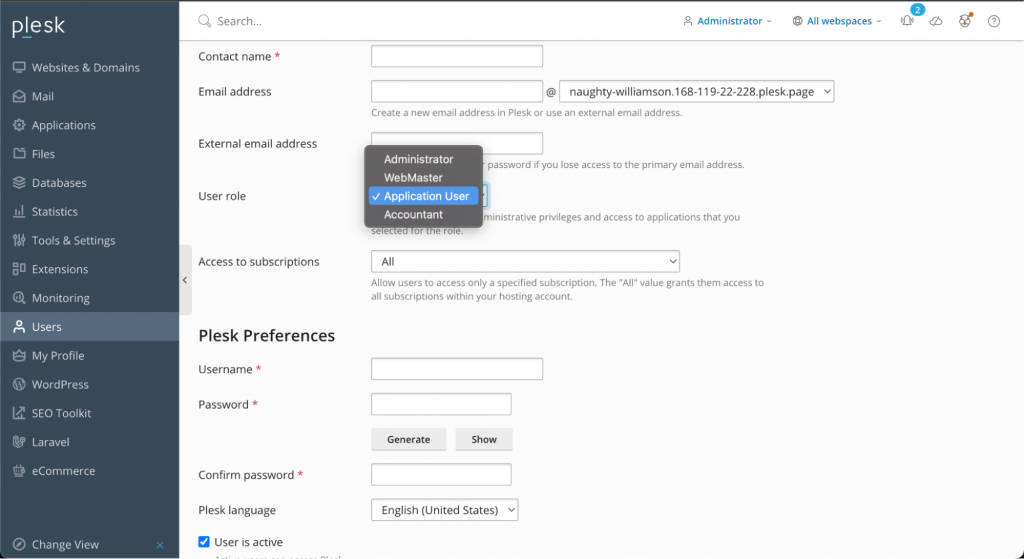
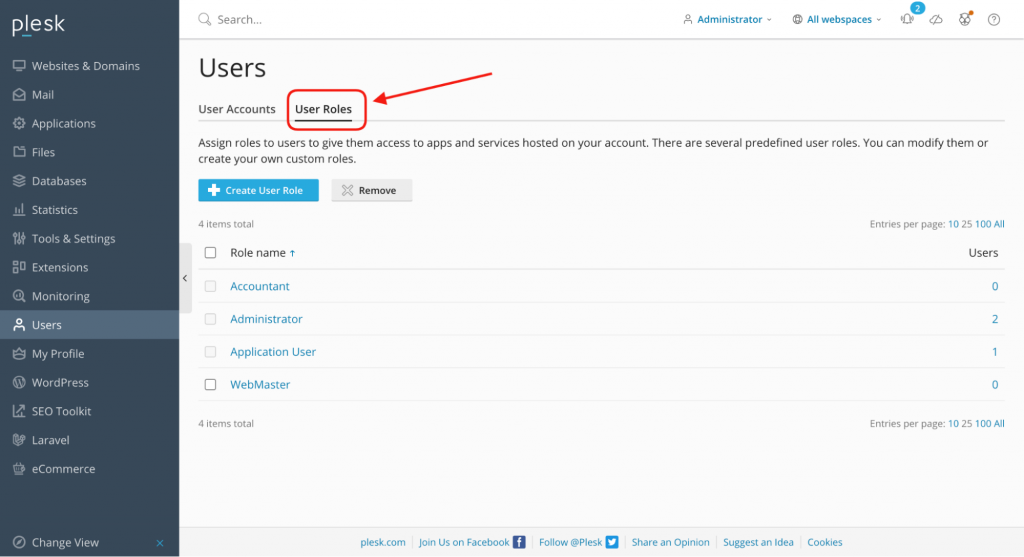
A User Role is a set of permissions regarding your website (or subscription) operations:
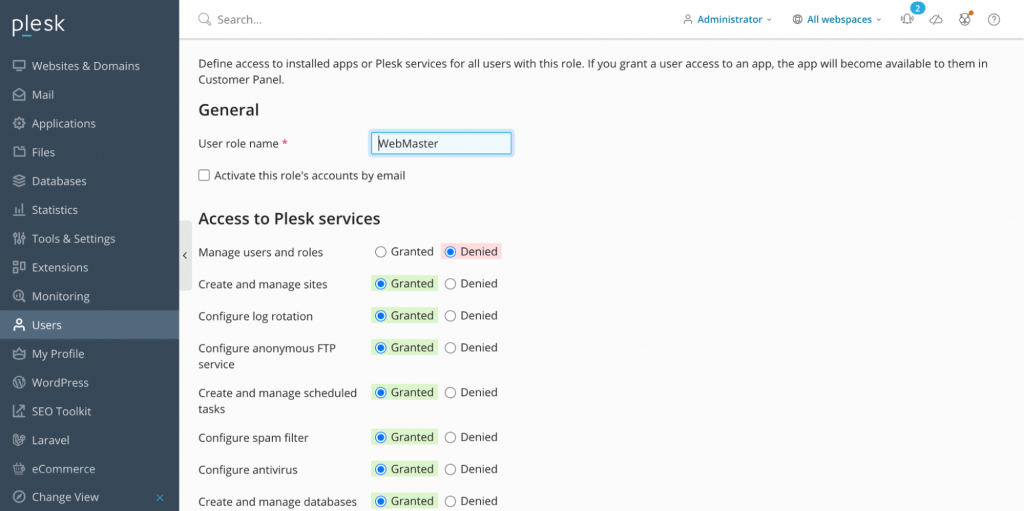
Note: Administrator role cannot be redefined, it always has all permissions.
You could also require account activation of a new user account by email. In such cases, the user will be activated only after they confirm their account by email.
So, let’s recap:
- The secure way to grant access to your website(s) is to use the ‘additional users’ feature.
- Such a user can get access to a particular website (or subscription) or to all your websites (subscriptions). It’s managed by the user account properties.
- Roles should be assigned to a user, which means a set of permissions. Such a role can be created/ re-defined.
- As soon as you don’t need to share your website any more, you can easily remove a user account.
- You can manage the additional users via Plesk Panel UI (‘Users’ tab) and the CLI
Useful references
Want to learn more about how users work on Plesk? Check out the complete documentation below:
🔍 Plesk official documentation about additional users
🔍 Manage additional users via CLI


One comment
As soon as you don’t need to share your website any more, you can easily remove a user account.