To save time for what matters most, we have developed .NET Toolkit, a Plesk extension that makes hosting .NET applications a breeze. So, what can it do, you ask?
- Manage installed versions of the ASP.NET Core Runtime.
- Create a website running on ASP.NET Core with just a few clicks.
- Manage environment variables.
- View logs of ASP.NET Core applications.
- Restart the application.
Have we caught your interest? Let us walk you through the process of adding your .NET application in Plesk.
Why do I need Plesk on my server?
Before we start, you may want to ask, “What the hell is Plesk, and why do I need to install it on my server?”
In a nutshell, it’s a control panel that helps you to focus on the main job: website development.
Plesk will do the rest for you. No more worries about such aspects of web hosting as server management, security, mail, SSL certificates, backup, and so on: it’s all preconfigured and available for you in a user-friendly GUI with the ease of a few clicks.
Want to know more? Read about Plesk.
And now, let’s jump directly into .NET application hosting.
Install Your .NET application
First, we want to create a new domain in Plesk by clicking the Add Domain button and selecting the .NET site from the list of available options.
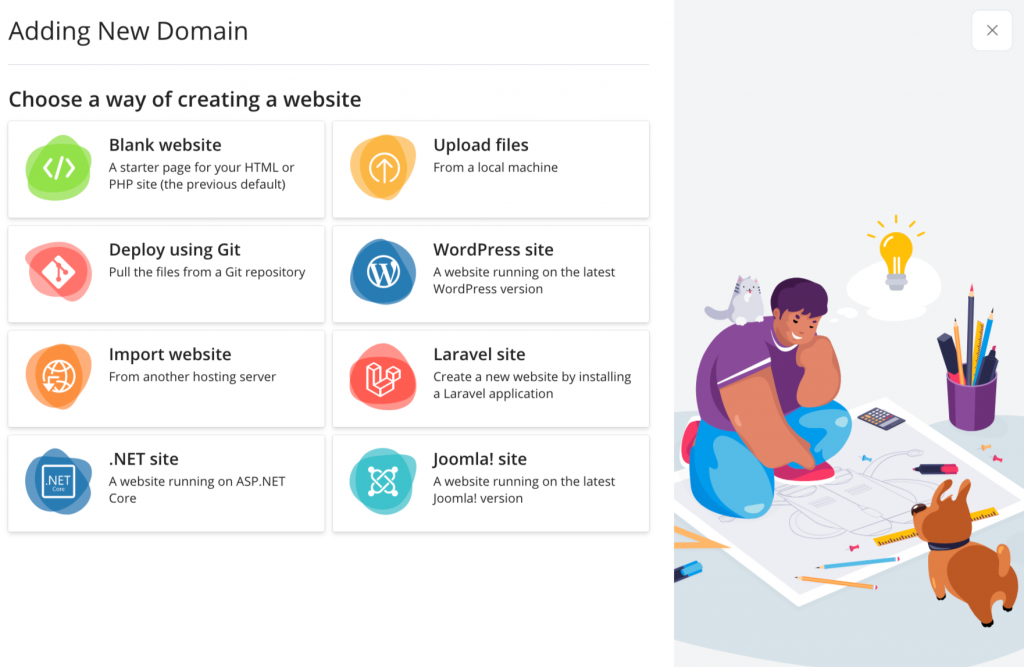
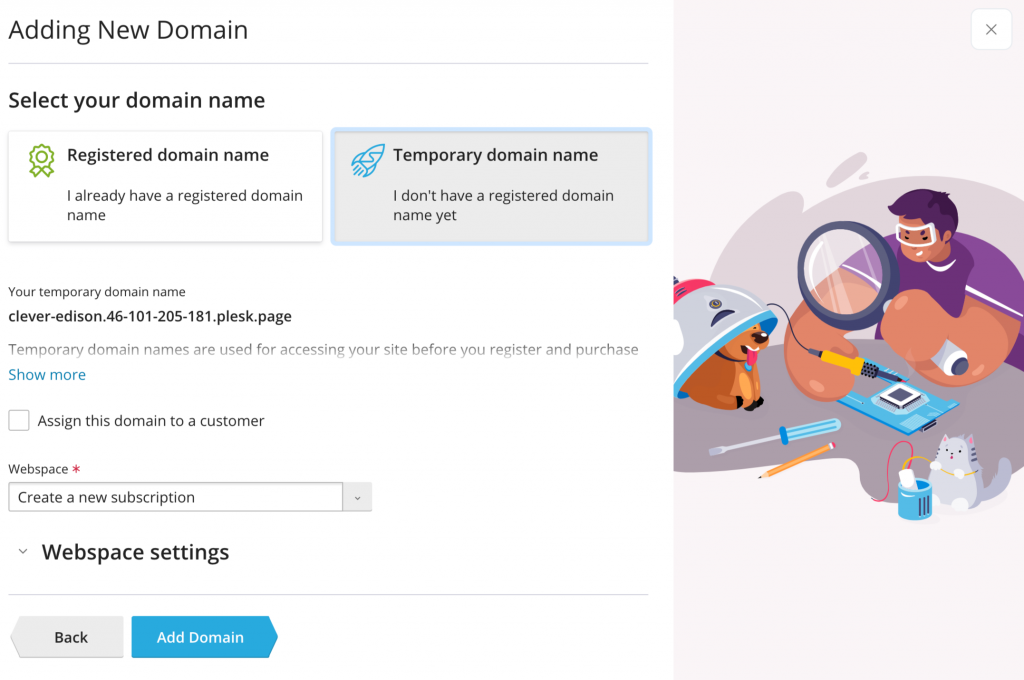
Don’t worry if you do not have a domain name for the website just yet. For now, you can use a temporary domain name, courtesy of Plesk.
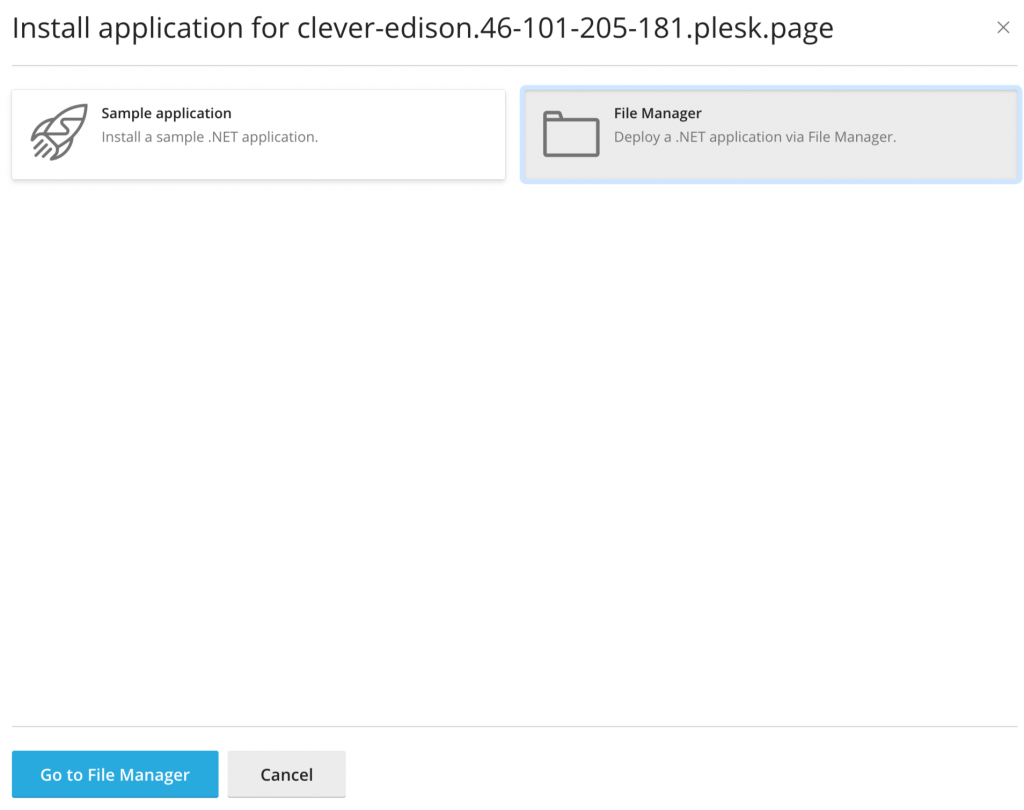
Once the website has been created, Plesk will ask you kindly to choose between installing a default skeleton .NET application and uploading the application content using the Plesk File Manager.
We’ll upload a custom .NET application based on the Blazor framework.
Let’s go to File Manager and upload a ZIP archive with a .NET application by clicking “+” > Upload File. Then, we can extract the archive to the /httpdocs folder (Archive > Extract Files).
We can now delete the source files because we’ll use the already-built project. Just move the project files from /bin/Debug/net6.0/publish to the /httpdocs folder.
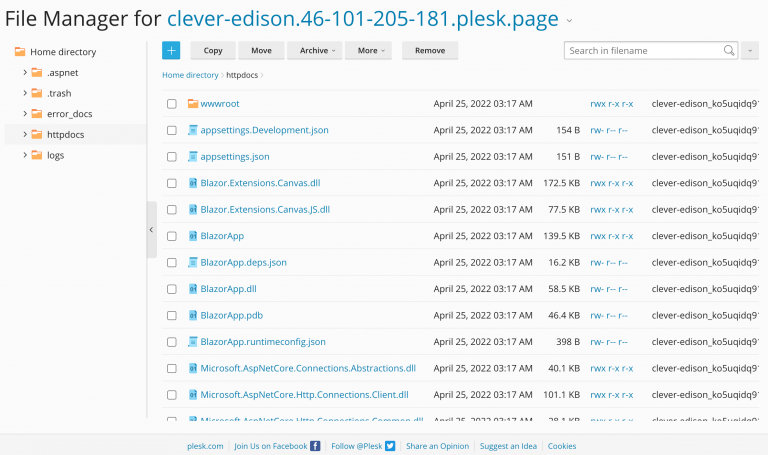
Finally, the content was uploaded successfully. Now, let’s configure the application to make it work!
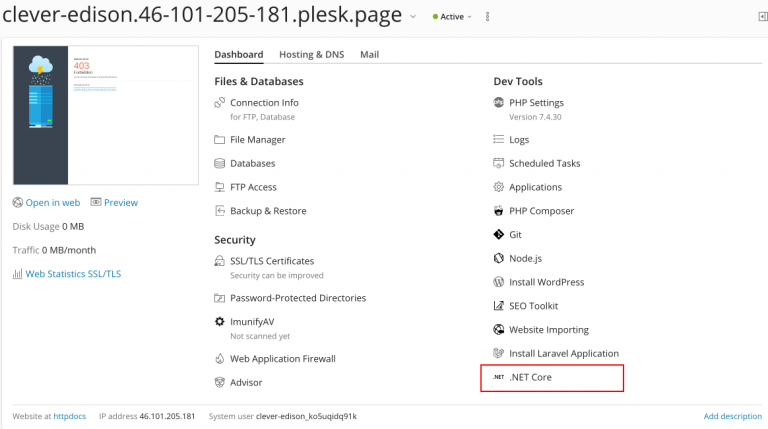
Clicking on the domain name opens a domain card with many options. Simply click the .NET Core button here.
Configure Your .NET Application
Before running the application, you need to configure it by specifying “Application root”, “Document root”, and “Application startup file” parameters.
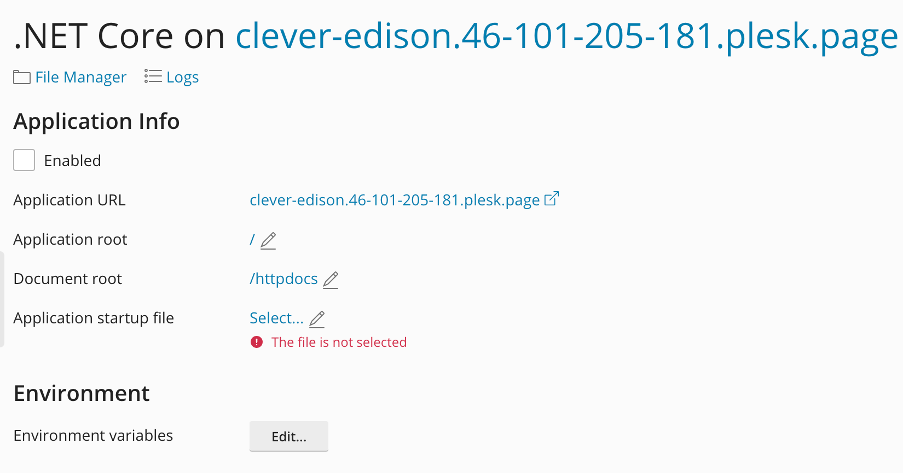
* (not configured)
- Next to “Application Root”, select the directory where you uploaded all the application’s files and subdirectories.
- Next to “Document Root”, select the directory with the application’s static content files.
- Next to “Application startup file”, specify the name of the file that starts the application. The startup file must be located in the “Application root” directory.
- Select the “Enabled” checkbox to run the application and then click the Apply button to apply changes.
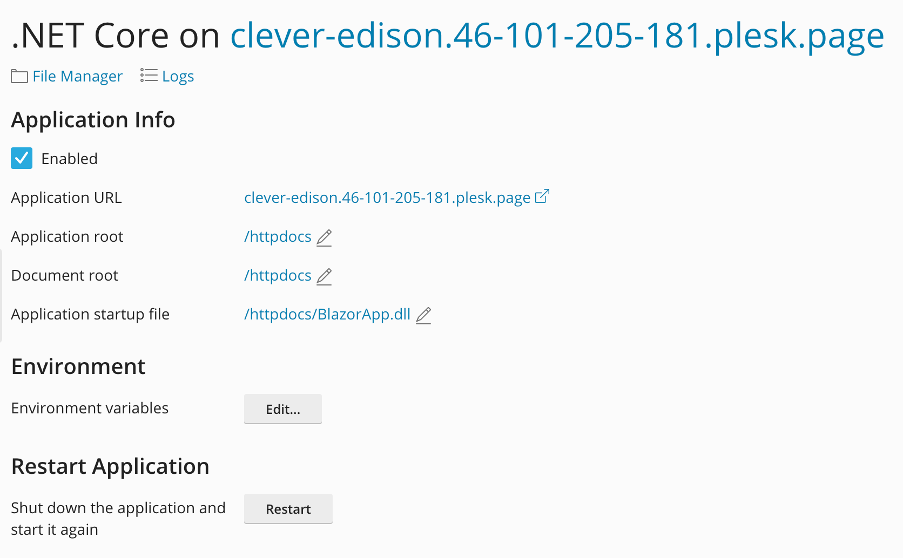
* (configured)
If you click on the application URL, you will see that your application is already available on the web!
Alright, you can finally run your own .NET application in Plesk for Linux. Applause! It does not require a Windows license. You can do whatever you like! Personally count numbers, create to-do lists, and chat with strangers…
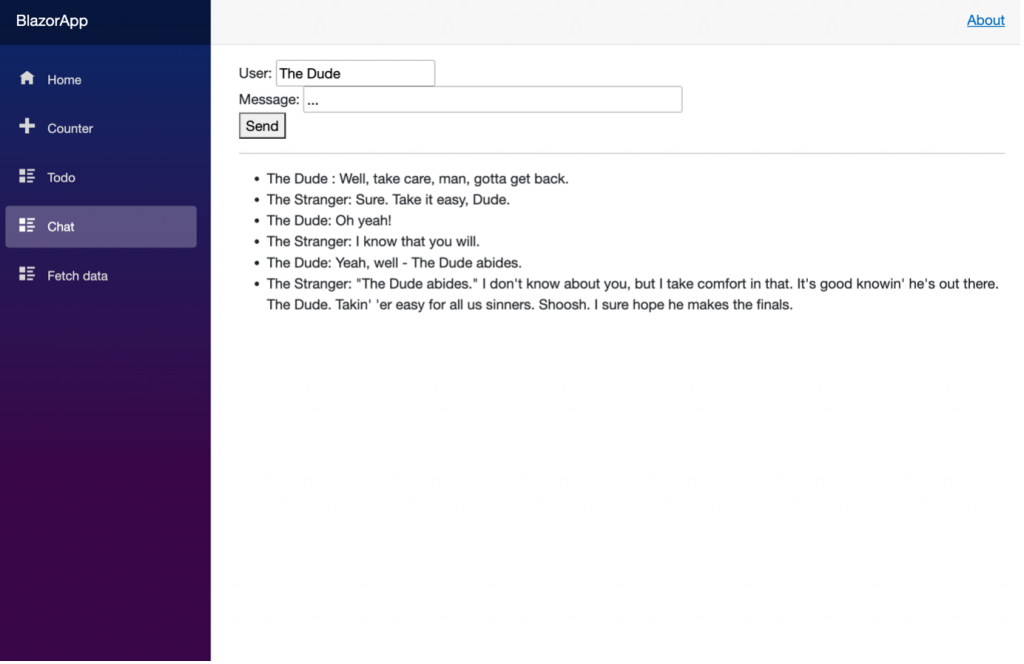
*(The Dude abides)
Manage Your .NET Application
Let’s look at the management options available in .NET Toolkit for running .NET applications.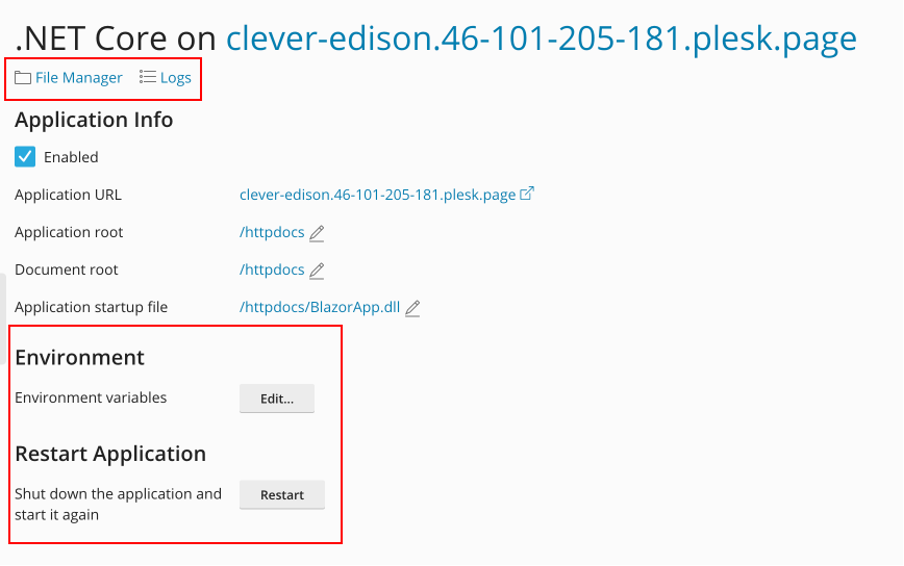
Click “File Manager” to update the website content.
Changes aren’t always applied on a running application, so here’s where the Restart button comes in. Simply use it to restart the application manually right from the interface.
If you need to check your application logs, you can easily access them using the Plesk Log Browser (click the Logs button on the .NET application page).
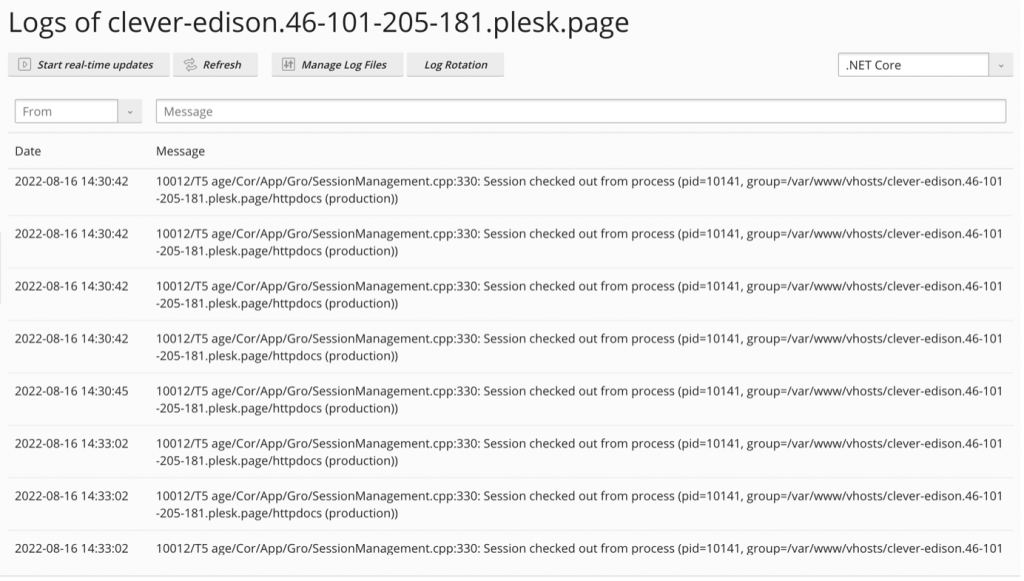
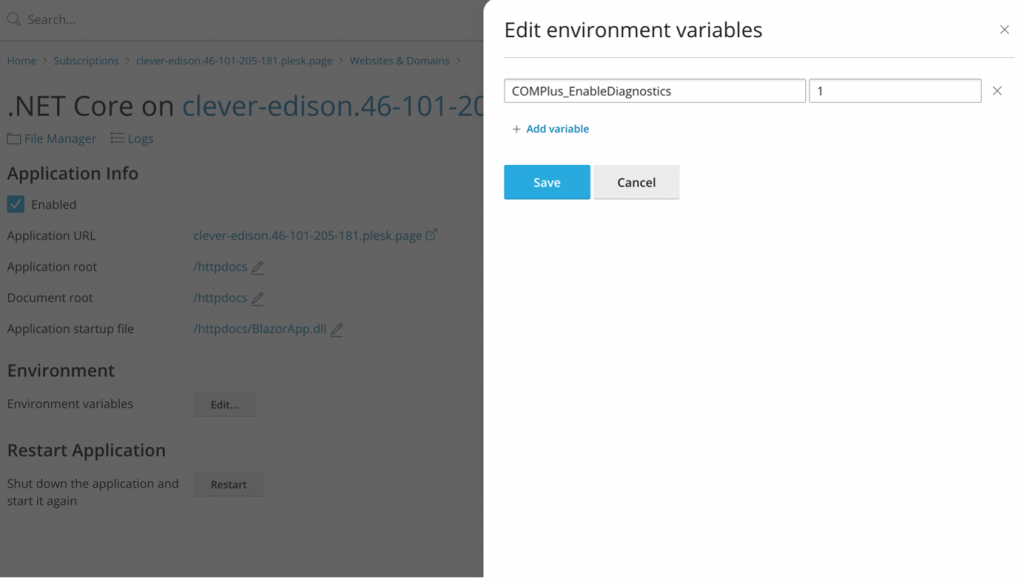
Sometimes, apart from log troubleshooting, you may need to set additional options to check the application. For example, enabling or disabling application diagnostics.
You can do this by using environment variables.
Manage versions of the ASP.NET Core Runtime
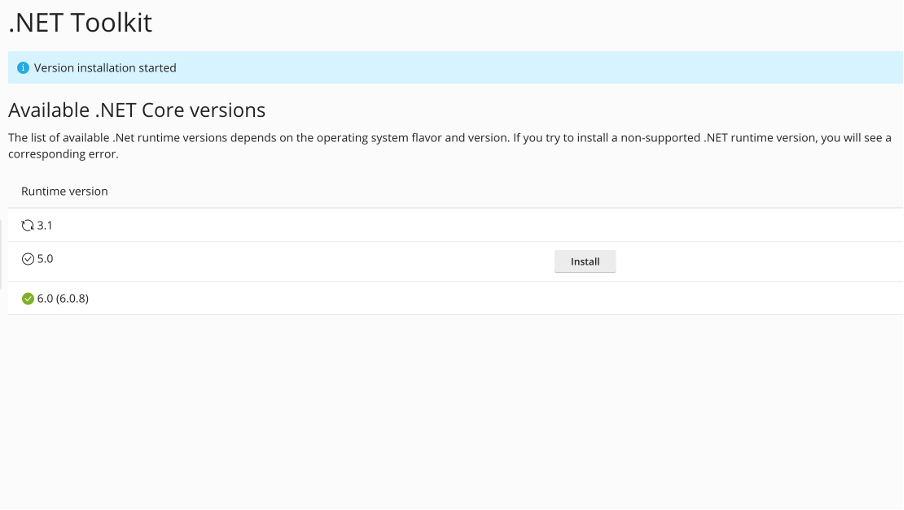
Finally, the last thing worth mentioning: Installing .NET Toolkit also preinstalls ASP.NET Core version 6.0.
But what if you are the Plesk Administrator and you or your customers hosting .NET websites need older ASP.NET versions? Can you easily install them on the .NET Toolkit server page? Of course!
Just go to Extensions > My Extensions > .NET Toolkit and click Open.
Are we missing anything? Let us know!
That’s all for today. We hope you’re as excited to try .NET Toolkit as we are to present it!
This year we’ve also continued to improve the Node.js hosting application, released the brand new Laravel Toolkit, and much more.
How are we doing? We’re always happy to hear your feedback! Write us at [email protected] or post your comments in the section below.


No comment yet, add your voice below!