When it comes to e-commerce, picking the right platform to power your online store is a difficult choice. Whichever one you go with needs to be fast, secure, and feature-filled, so where are you supposed to begin looking?
With over 1+ million active installs and a 4.6 user rating on WordPress.org, WooCommerce is one of the most popular free ecommerce solutions for WordPress. According to BuiltWith, as of January 2017, WooCommerce powered 42% of all online stores! So if you’re looking to open an online store on your WordPress-powered website, WooCommerce should be high on your list of contenders.
What is WooCommerce?
WooCommerce is an open source platform backed by a large community, who constantly updates it, creates new themes, plugins and all sorts of integrations, all of which are essential to a successful business. With hundreds of free and paid WooCommerce extensions, spanning all major logistical & technical needs, you can rest assured there’s an extension for your specific needs.
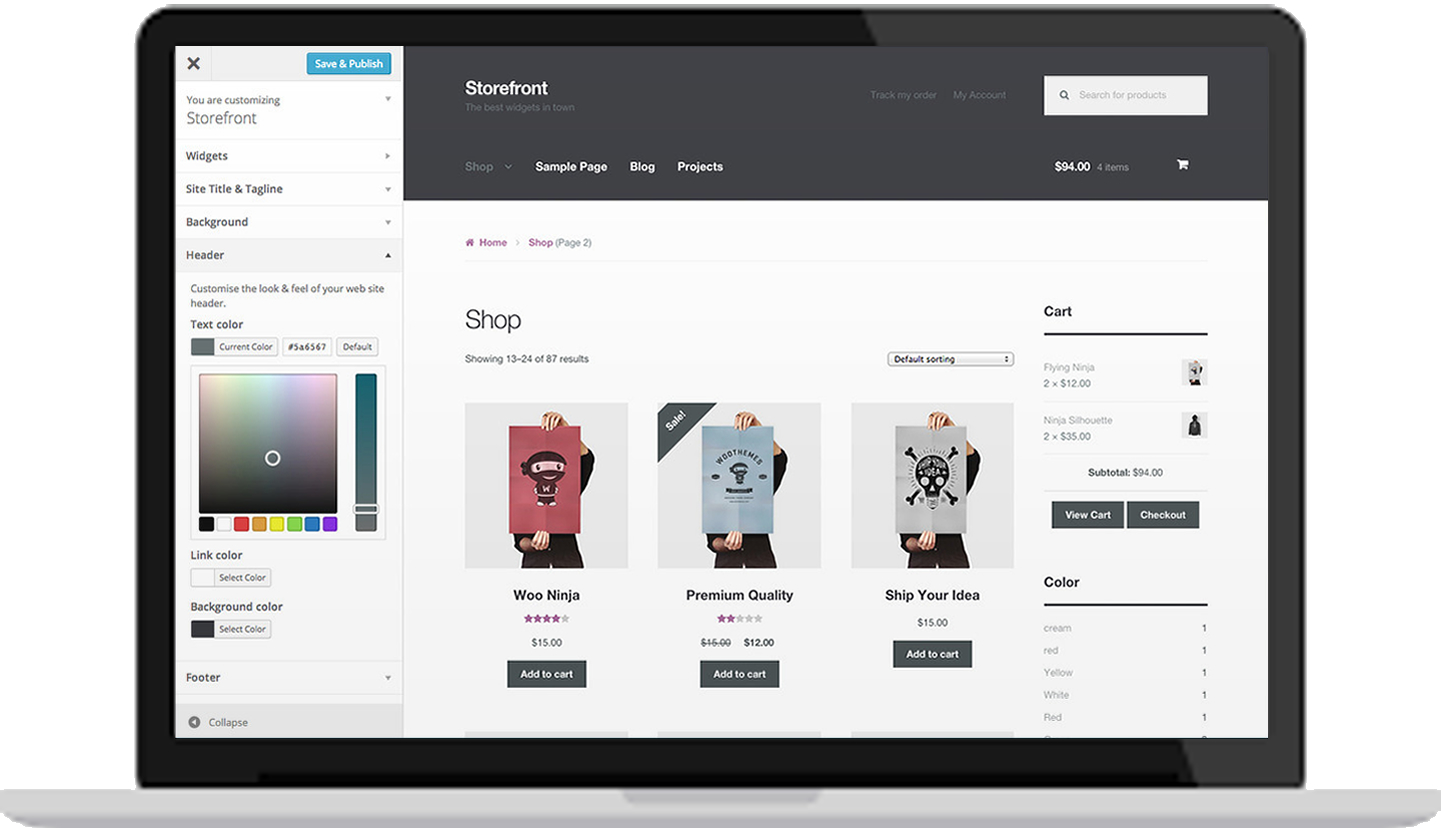 Image: WooCommerce
To show you how quick and easy it is to set up your own WordPress WooCommerce online store, I’ll give you a guided tour and walk you through the basic steps.
Here’s what we’ll cover:
- Choosing a fast and secure hosting environment
- Installing WordPress
- Installing and activating the WooCommerce plugin
- Choosing the proper theme for your site
- Importing the WooCommerce Dummy Data
- Managing multiple WooCommerce installations
- Adding additional protection for your online store
And in my next article, I’ll explain how to add products, configure tax and shipping options and other general settings within your online store.
1. Choosing A Fast And Secure Hosting Environment
When it comes to choosing a fast and secure hosting environment for your online store, the options are endless, but it is good to be extra picky when selecting a host to make sure your income isn’t restrained by the performance of your website.
If you are just starting out with a small inventory and expect limited customer traffic, you could get by with a budget, entry level shared hosting. Most shared hosts will give you the option of leveling up as your online store grows in size and traffic.
But if you are planning to launch a large online store, or one that is expected to scale quickly, you would be better off with a high-performance service provider.
Premium managed hosting is a good option for serious e-commerce stores because you would be hosted on a server that is optimized to load WordPress more efficiently. Also, managed hostings will come with experts who will be proactively monitoring your website and will be on hand should anything go wrong. This alone justifies the higher price tag.
In addition to that, there are several technical considerations to take into account:
-
Having a PCI DSS (Payment Card Industry Data Security Standard) compliant host guarantees that your provider takes security seriously and maintains it continuously.
-
Having a SSL (Secure Sockets Layer) certificate bundled within your hosting plan ensures the security for your website by encrypting communication between the server and the person visiting your online store. It’s required for all e-commerce sites that accept credit card payments online.
Plesk tip:
If you manage your host via Plesk, all these are taken care of for you. All Plesk users can get a free SSL certificate powered by Let’s Encrypt, and deploy SSL protection in a few steps. This means you don’t need to purchase your certificate separately and struggle with installation.
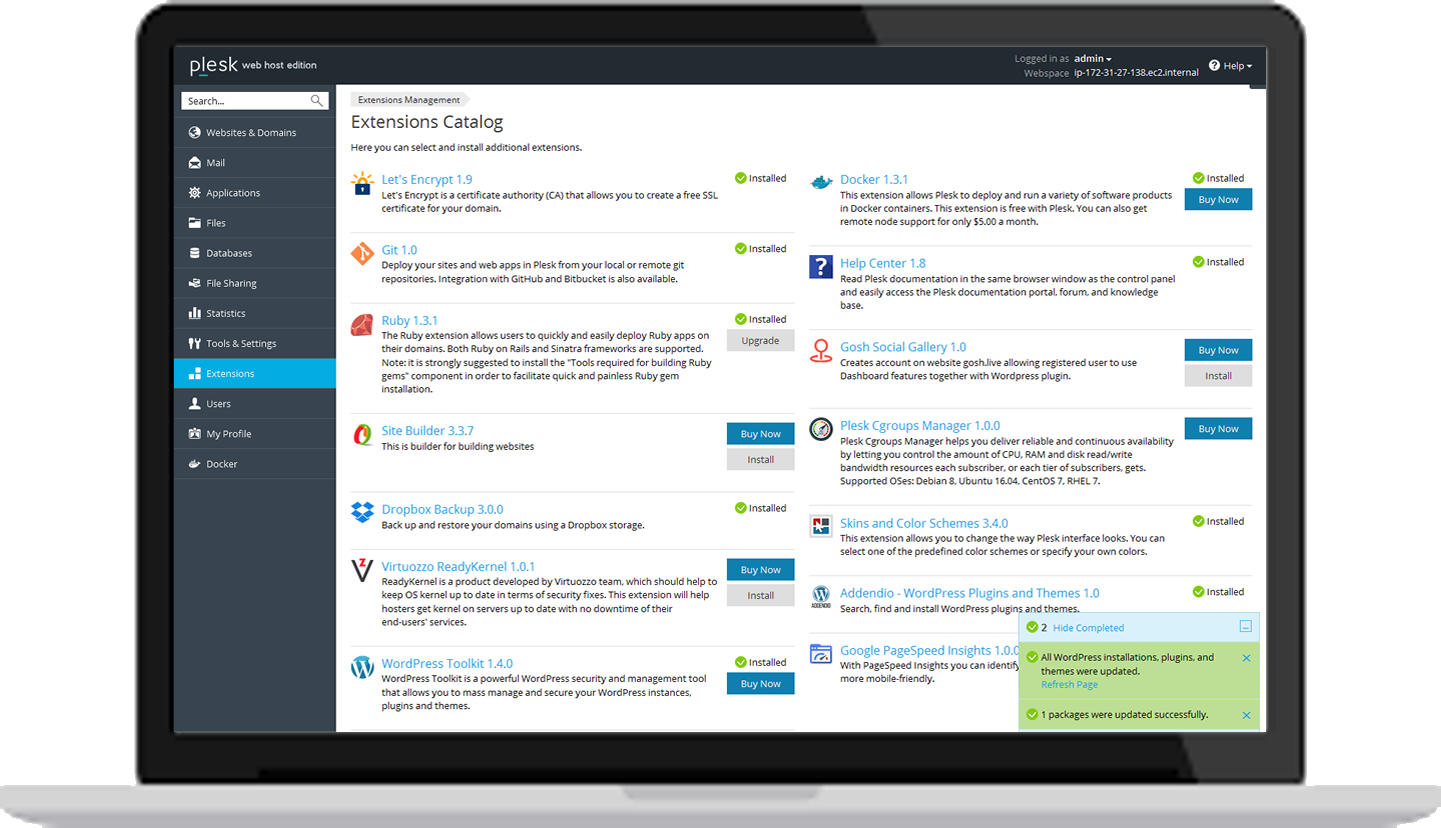 Image: Plesk Onyx – Extension Catalog
-
Make sure that your host support PHP 7, because it’s up to twice as fast as PHP 5.6, which means you’ll need fewer servers to serve the same amount of users. If your host supports PHP7, ask them how to activate it. For Plesk users, it’s just a click to enable PHP7 – here’s how.
- Use a caching plugin to ensure that your site is lightning fast and improve your Google page rank. A slow site can push you down in Google’s rankings, and your website visitors might give up trying to explore your store if it takes too long to load.
Plesk tip:
If you’re looking for a free, easy to install caching option, WP Super Cache is one of the best options out there.With its huge amount of customization options, W3 Total Cache is also great if you crave total control over your plugin. If you’re new to plugins, however, this option may be a little too in-depth.
However if you just want a simple solution, WP Rocket is a good option, as long as you are prepared to spend a little money.
2. Installing WordPress
In this example, I’ll be using Plesk Onyx and the Plesk WP Toolkit to simplify the WordPress installation process.
The Plesk WP Toolkit is ideal for your WordPress WooCommerce store because it helps you manage your infrastructure and security, and also offers a ready-to-code environment, Let’s Encrypt, Free SSL certificates, CloudFlare CDN, DDoS mitigation, PHP7, and other powerful technologies. Most importantly for this case, it also offers a 1-click installation to install WordPress.
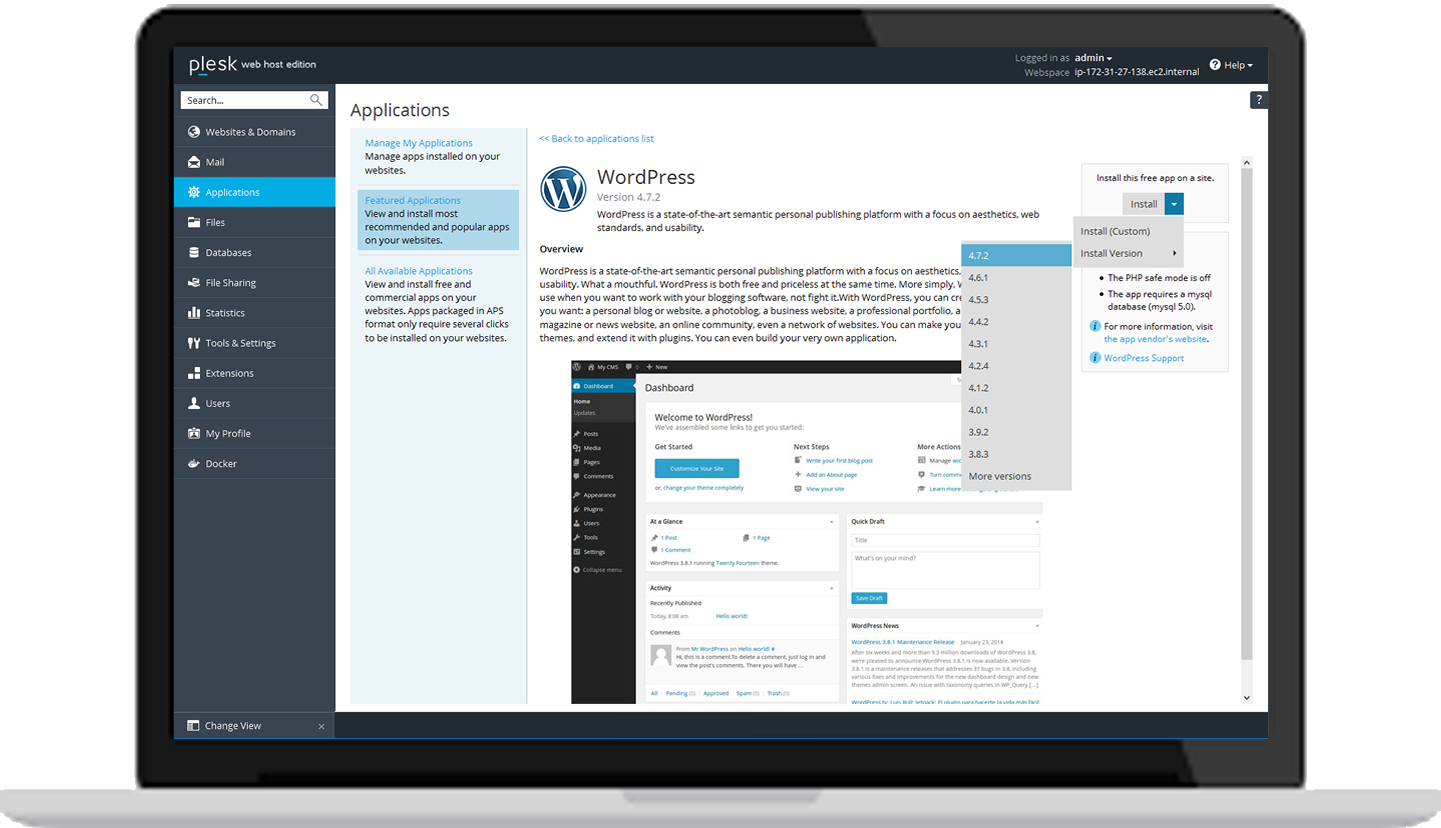 Image: Plesk Onyx – WP Toolkit
Installing WordPress in Plesk Onyx is as simple as heading to the applications tab on your control panel and picking a WordPress version to install, as seen in the screenshot above.
During the installation, like most common applications, a progress bar is presented, showing how far you are through the process. A few seconds later and everything’s done.
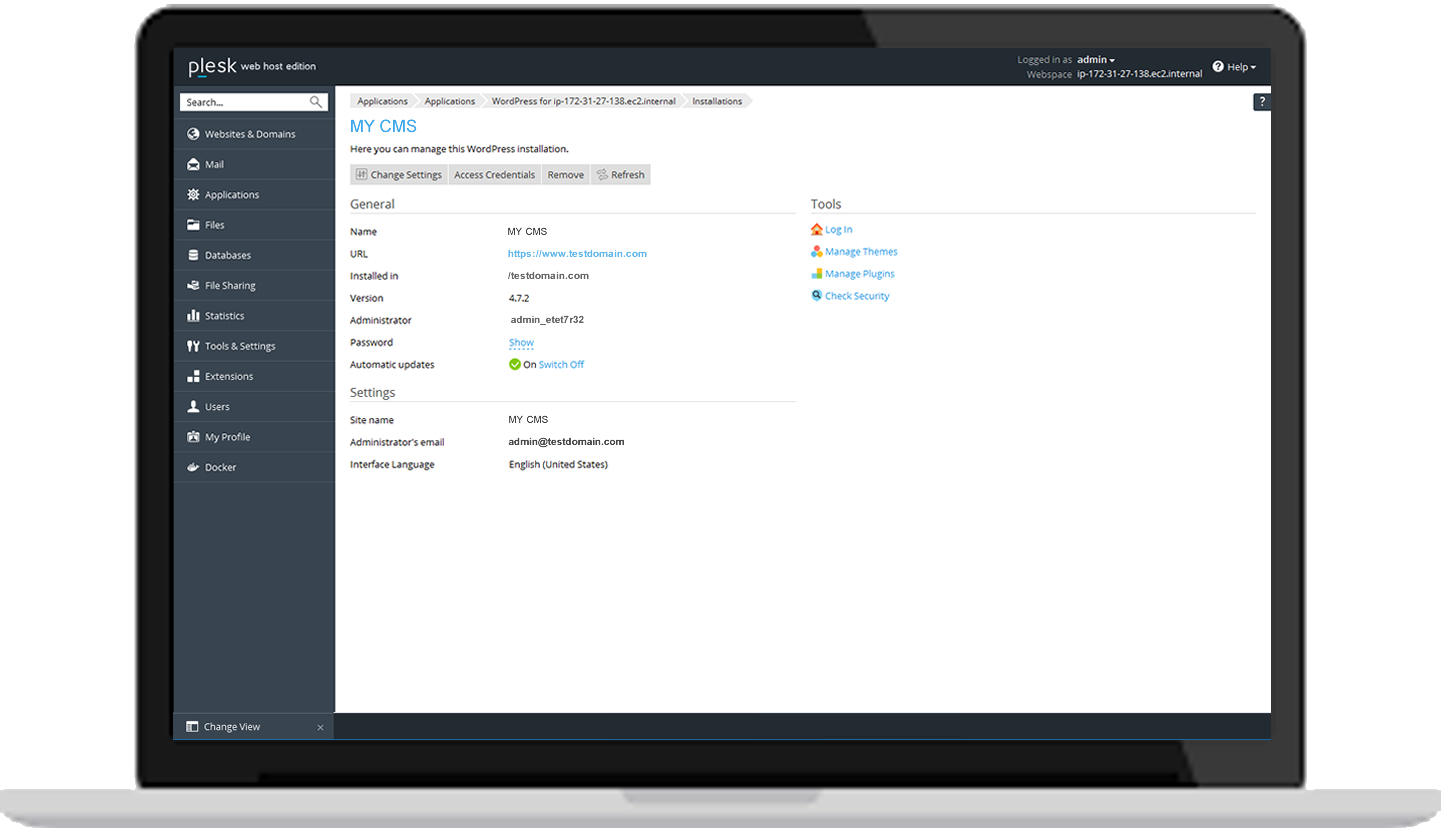 Image: Plesk Onyx – WordPress Installation
In the screenshot above, you see the admin dashboard which is available immediately after WordPress has been installed. On the dashboard, you are presented with an overview of your installation where you can see key details, such as the site name, URL, administrator’s details. On the right-hand side, there are links to your key management options for configuring themes, plugins and security.
3. Installing The WooCommerce Plugin
Clicking Manage Themes or Manage Plugins from the admin dashboard immediately gives you the ability to install, activate, or delete a plugin or installed theme of your WordPress installations – as shown in the screenshot below.
Adding WooCommerce is as easy as 1-2-3
Click Manage Plugins > Install Plugin at the top of the plugin list and search for WooCommerce to install. Click on Install.
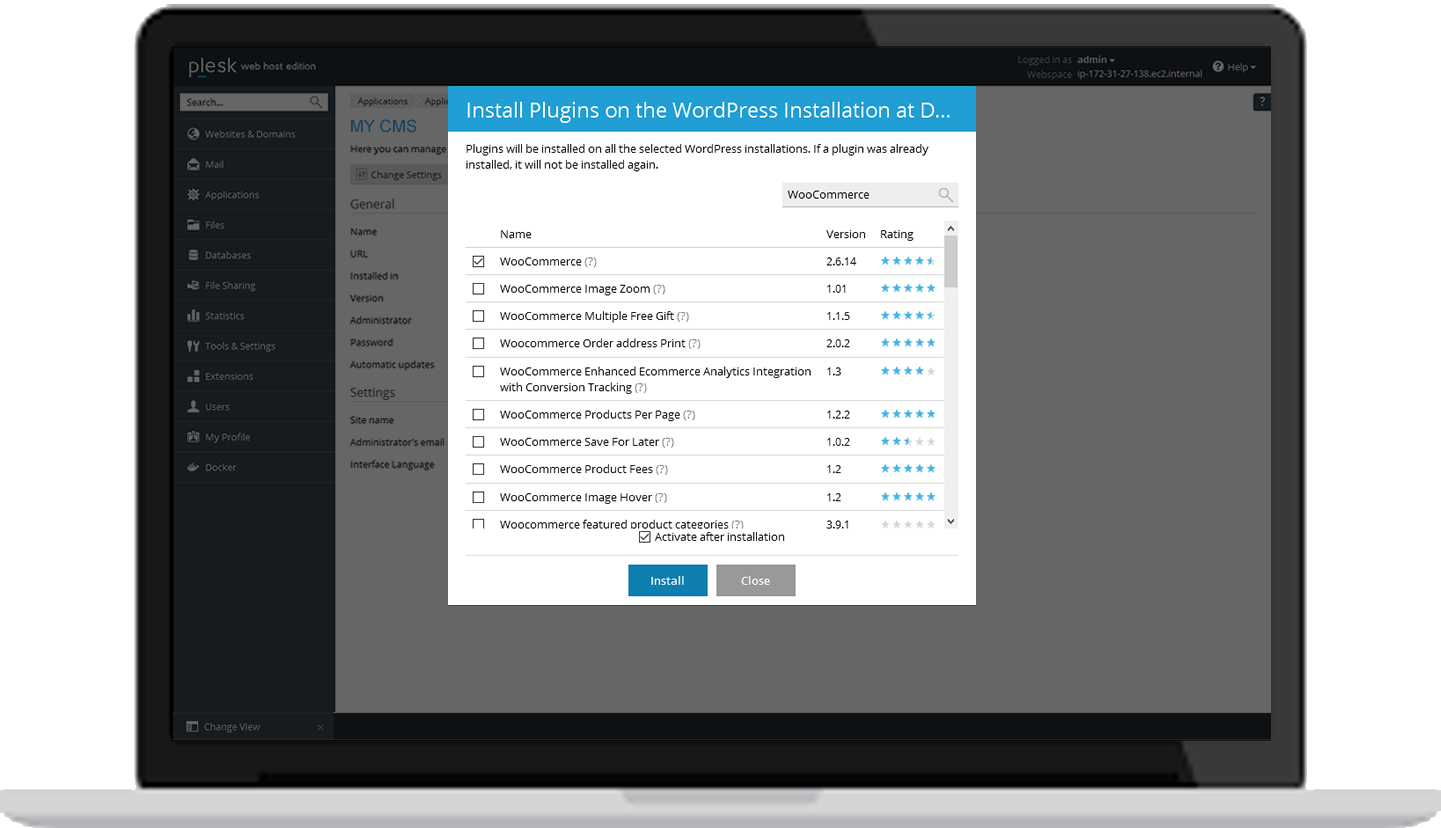 Image: Plesk Onyx – Install Plugins
Plesk tip:
Plesk Onyx keeps everything in one location, making managing plugins ever so much simpler than in a standard WordPress installation.
- To activate an inactive plugin, click the checkbox next to its name and click Ok
- Want to disable a plugin? Uncheck it and click Ok
- Want to delete a plugin? Click on the bin icon on the right
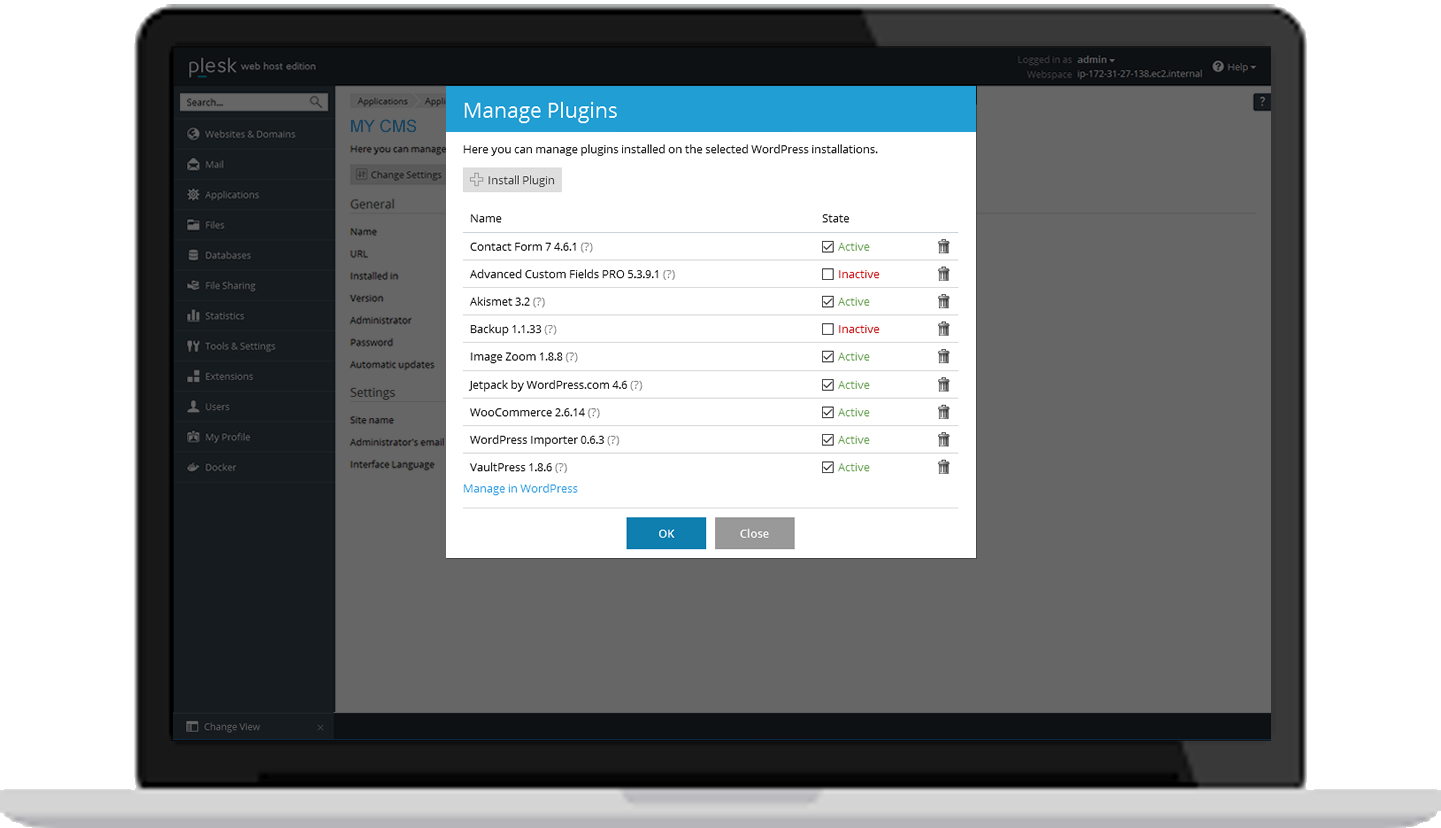 Image: Plesk Onyx – Manage Plugins
Immediately after activating the plugin, you’re taken to the onboarding wizard. You can use the wizard, or skip it and manually set up everything. We recommend giving the wizard a go if it’s your first time using the platform. Let’s check it out together by clicking on Let’s Go!
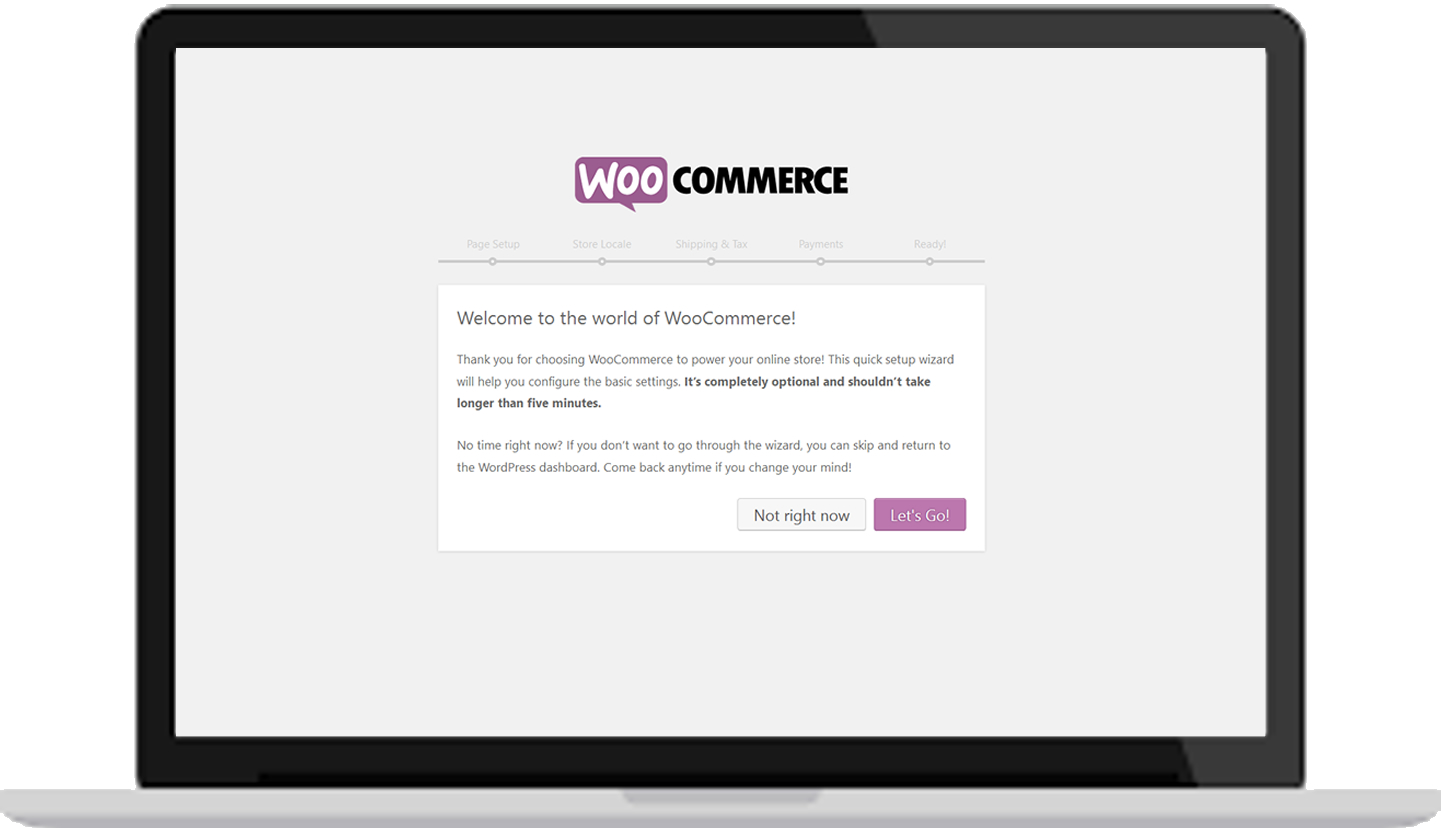 Image: WooCommerce – Onboarding Wizard
Page Setup
The wizard first helps to set up pages needed for an ecommerce online store, such as the shop page, cart page and checkout. Select Continue to automatically install pages.
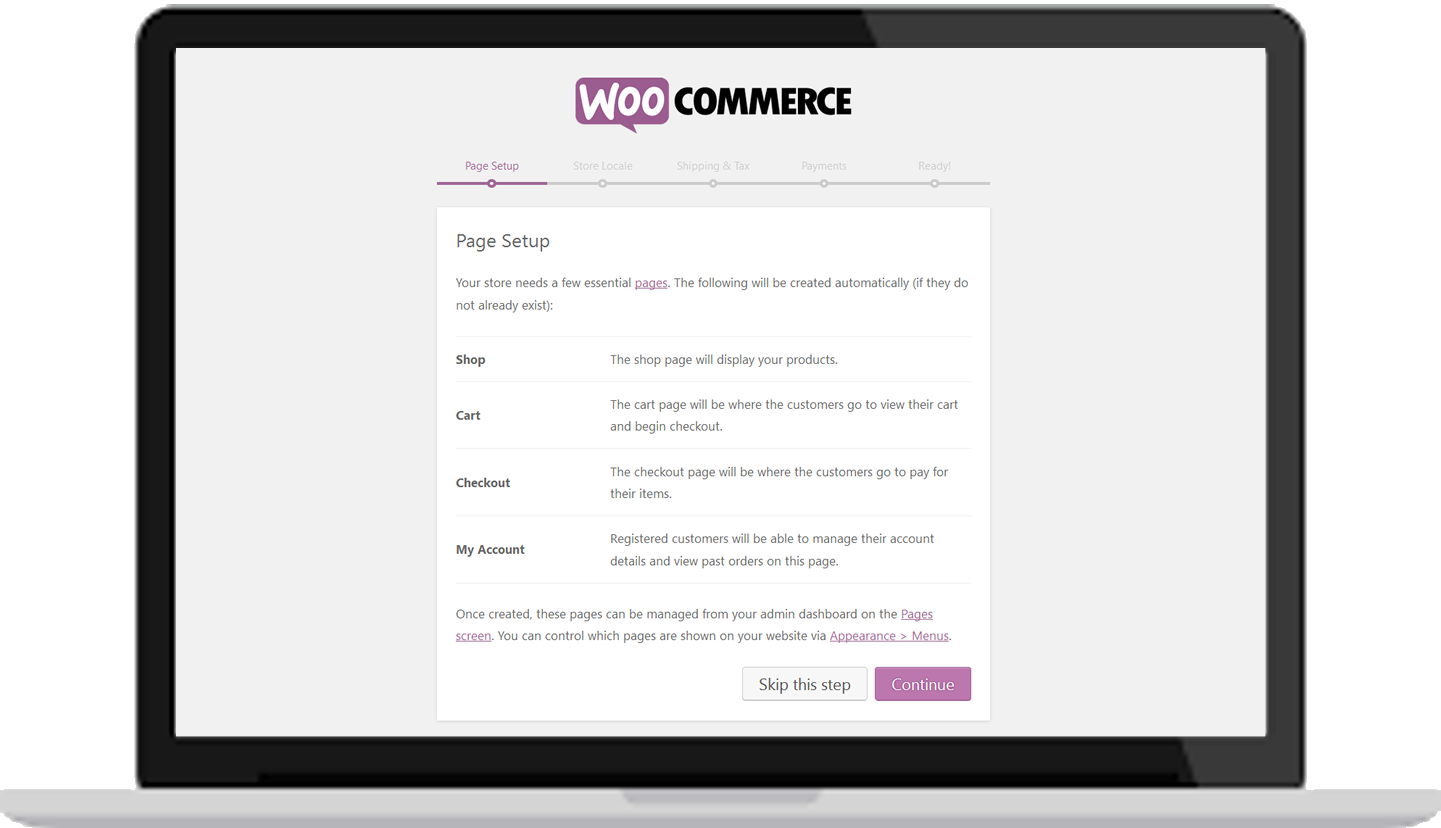 Image: WooCommerce – Page Setup
Store Locale
Next is your store’s location, currency and dimensional units for shipping calculations (cm, inches). WordPress WooCommerce automatically detects your location using your IP address and selects the country, currency and units. Confirm that the data is correct, and then select Continue.
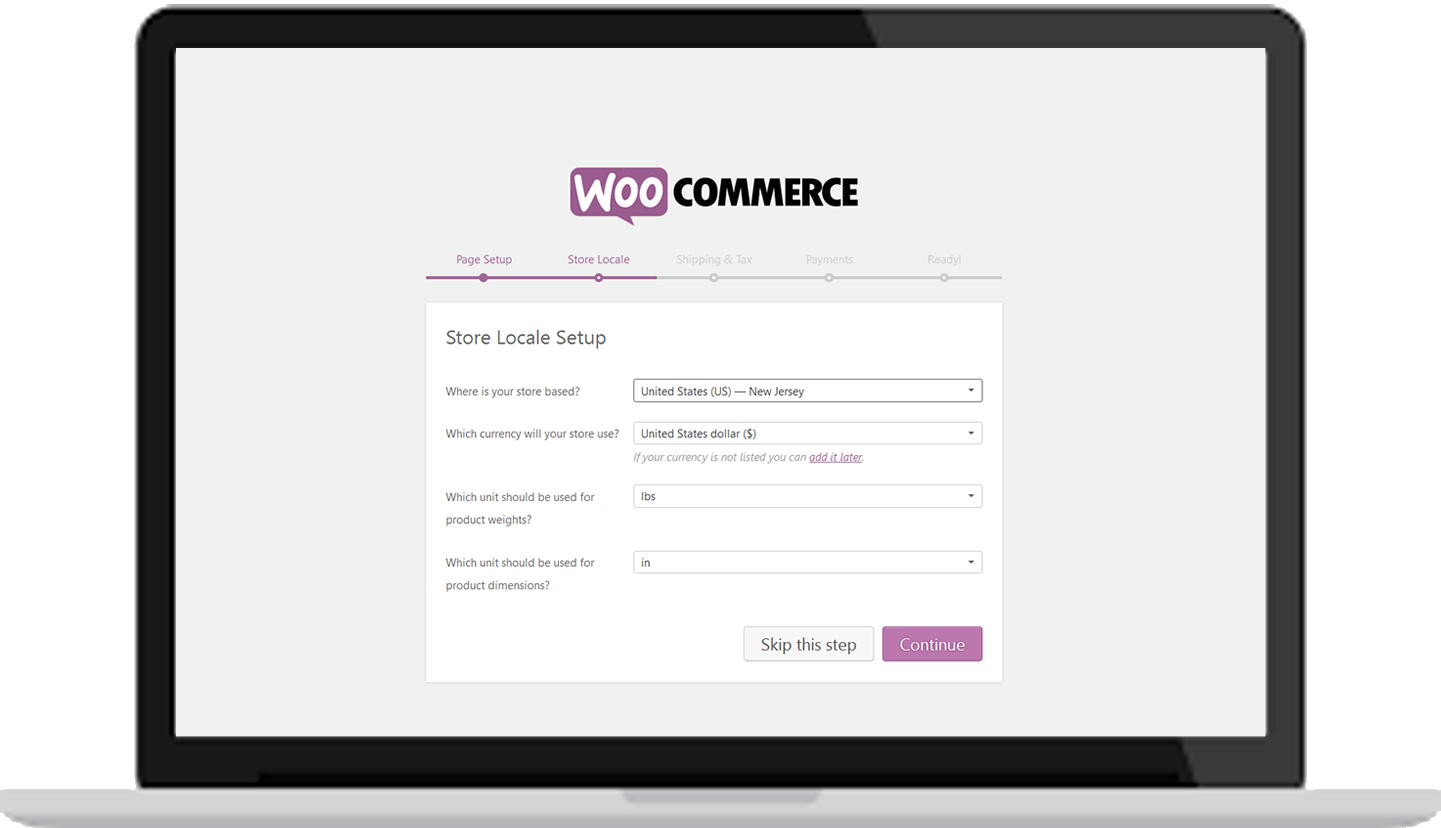 Image: WooCommerce – Store Locale Setup
Shipping & Tax
Shipping and Taxes can be enabled for your online store, if needed. If you enable taxes, further options will appear. Choose how to enter prices, with/without tax, and check the list of taxes WooCommerce will create for you (can change later). Consult a tax professional to ensure your rates are correct.
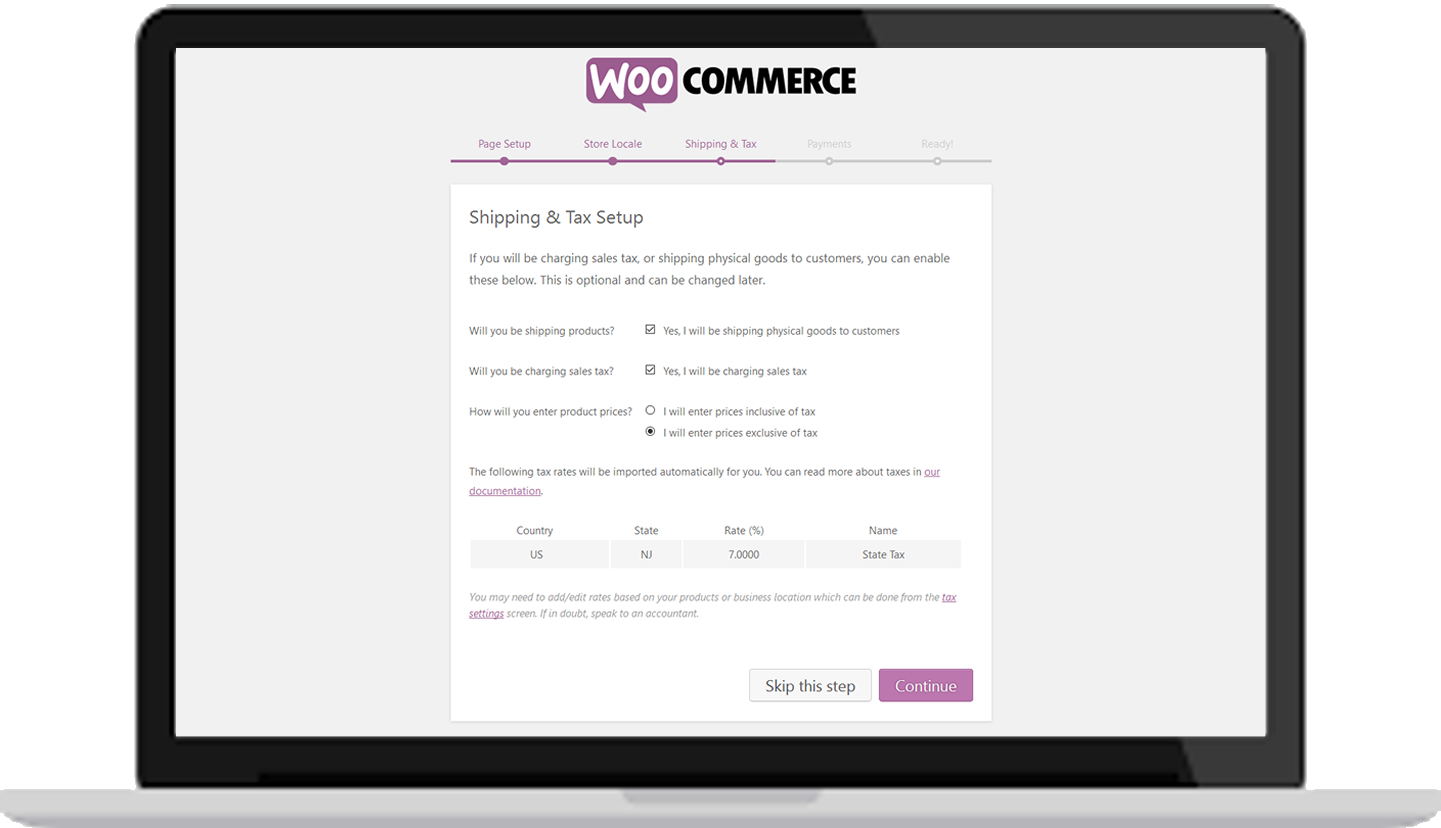 Image: WooCommerce – Shipping & Tax
Select Continue when you’re satisfied.
Payments
Finally, how you want to be paid.
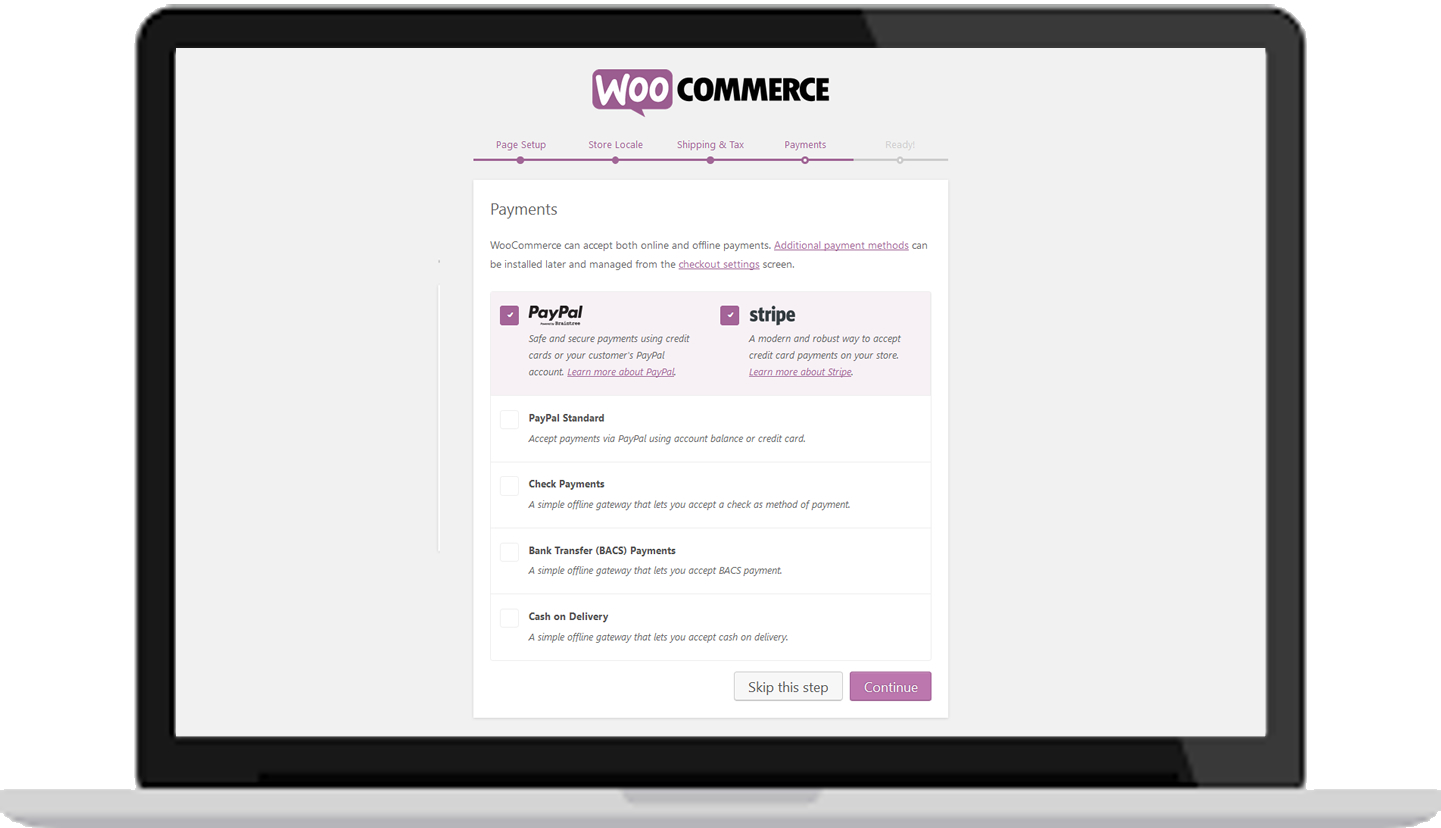 Image: WooCommerce – Payments
- PayPal powered by Braintree and/or Stripe — free, separate plugins we offer — are downloaded automatically from WordPress.org.
- If you enable PayPal Standard, enter an email address associated with that account.
Ready!
The wizard is complete, and now you’re ready to start selling. The only remaining action is to add your products. Select the big Create your first product! button.
Or you can click through to access the setup guides and educational resources.
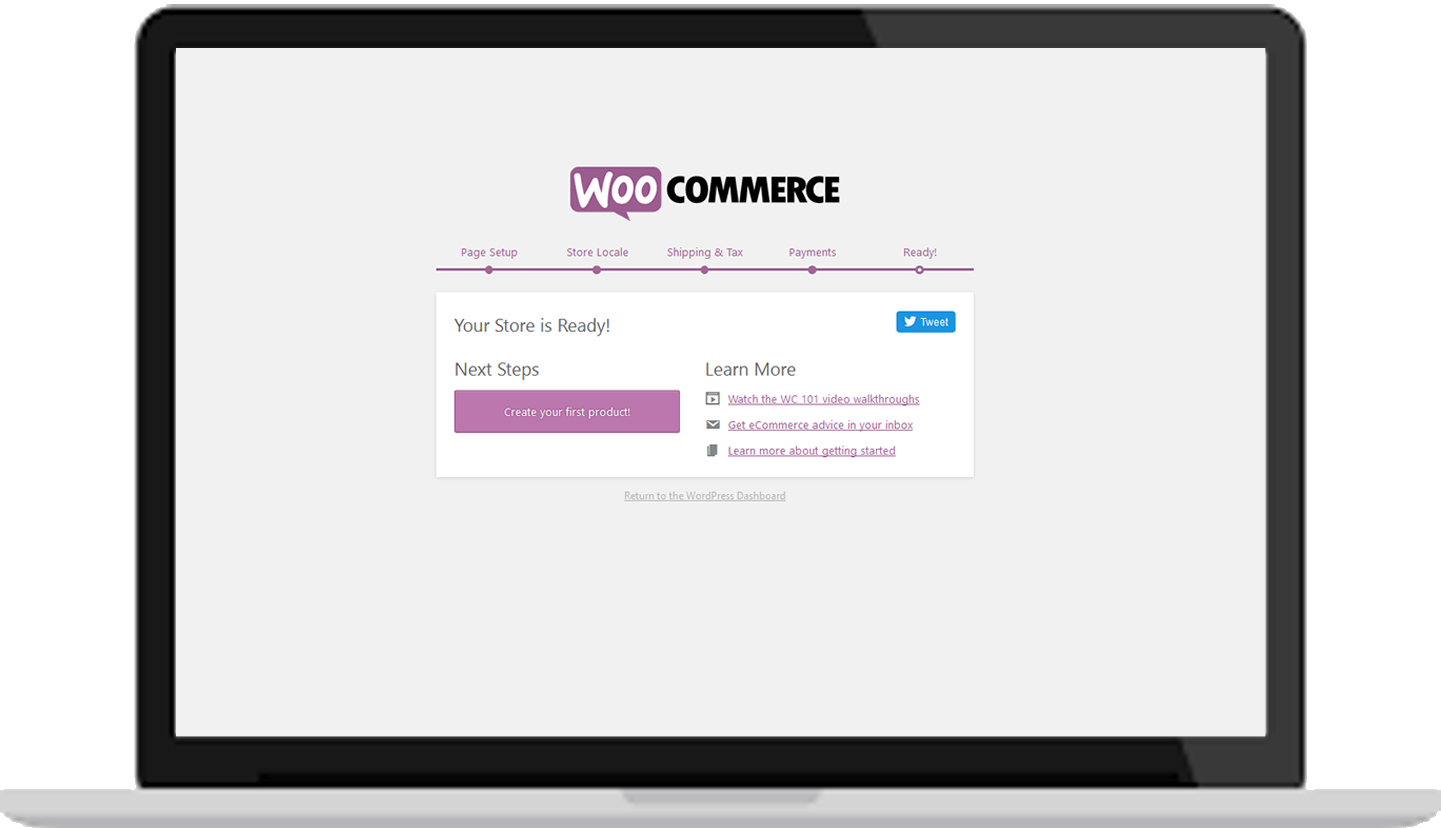 Image: WooCommerce – Your Store is ready!
Plesk tip:
If you’ve skipped the wizard when you installed WooCommerce, you can run the wizard again. Go to: Help > Setup Wizard and select Setup Wizard.
4. Installing The Proper Theme For Your Site
Say you want to install the Storefront theme, designed and developed by WooCommerce Core developers, or its free child theme Boutique, designed for small WooCommerce online stores/boutiques.
In the pop-up window, look for Storefront, or Boutique and click OK. Your theme will be activated after a few moments.
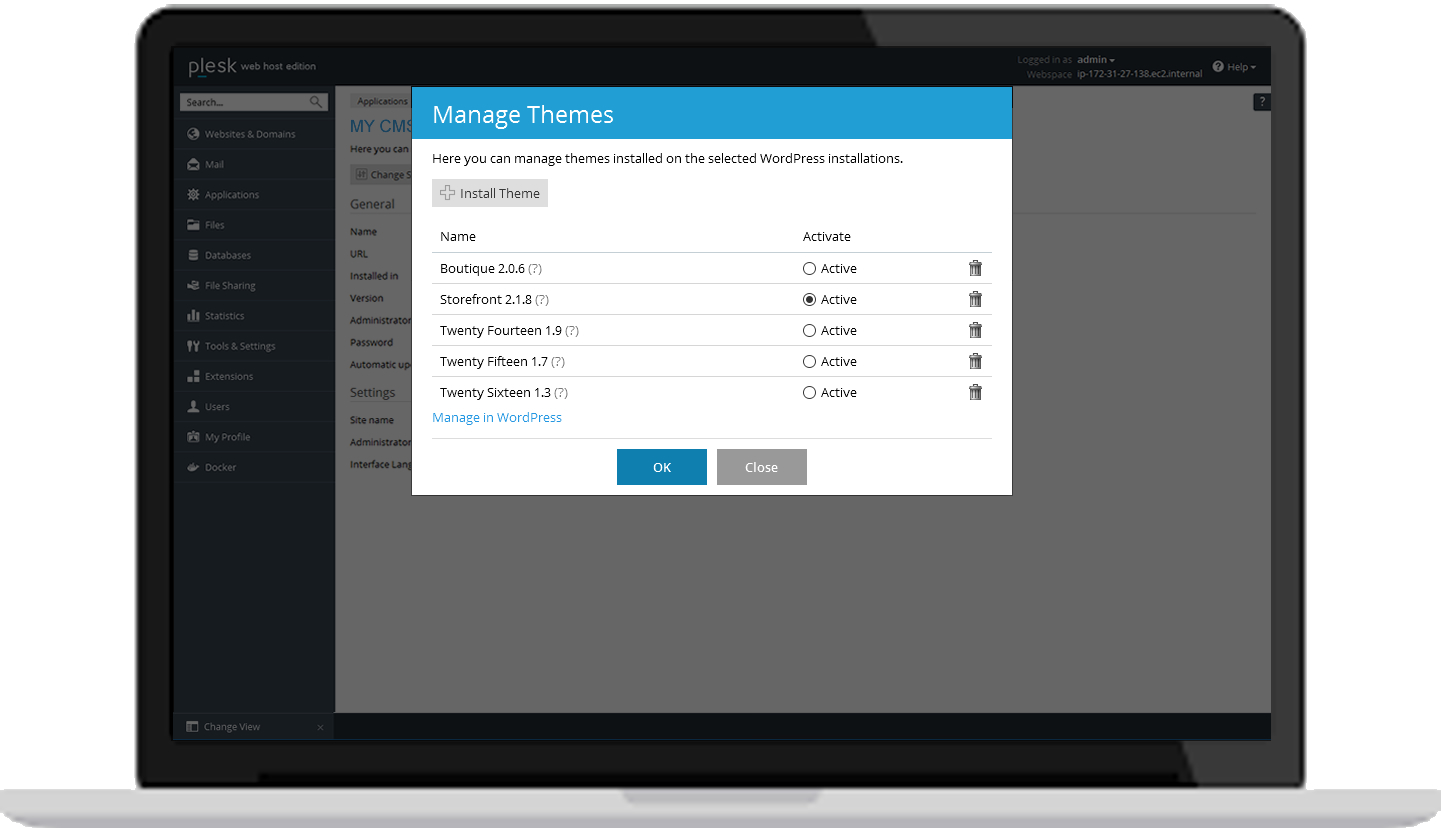 Image: Plesk Onyx – Manage Themes
5. Importing The WooCommerce Dummy Data
After you’ve installed WooCommerce, perhaps you’d like to see what your pages and products might look like. If so, WordPress WooCommerce has made some sample data available for us. Just right click and download it from here.
Plesk tip:
Dummy data contains products with images that will work with any theme. However, it doesn’t contain the same photos as the Storefront demo, as the demo uses proprietary photography.
From the WordPress admin, go to Tools > Import and select the WordPress option. If you don’t have the WordPress importer installed, first install it by selecting Install Now.
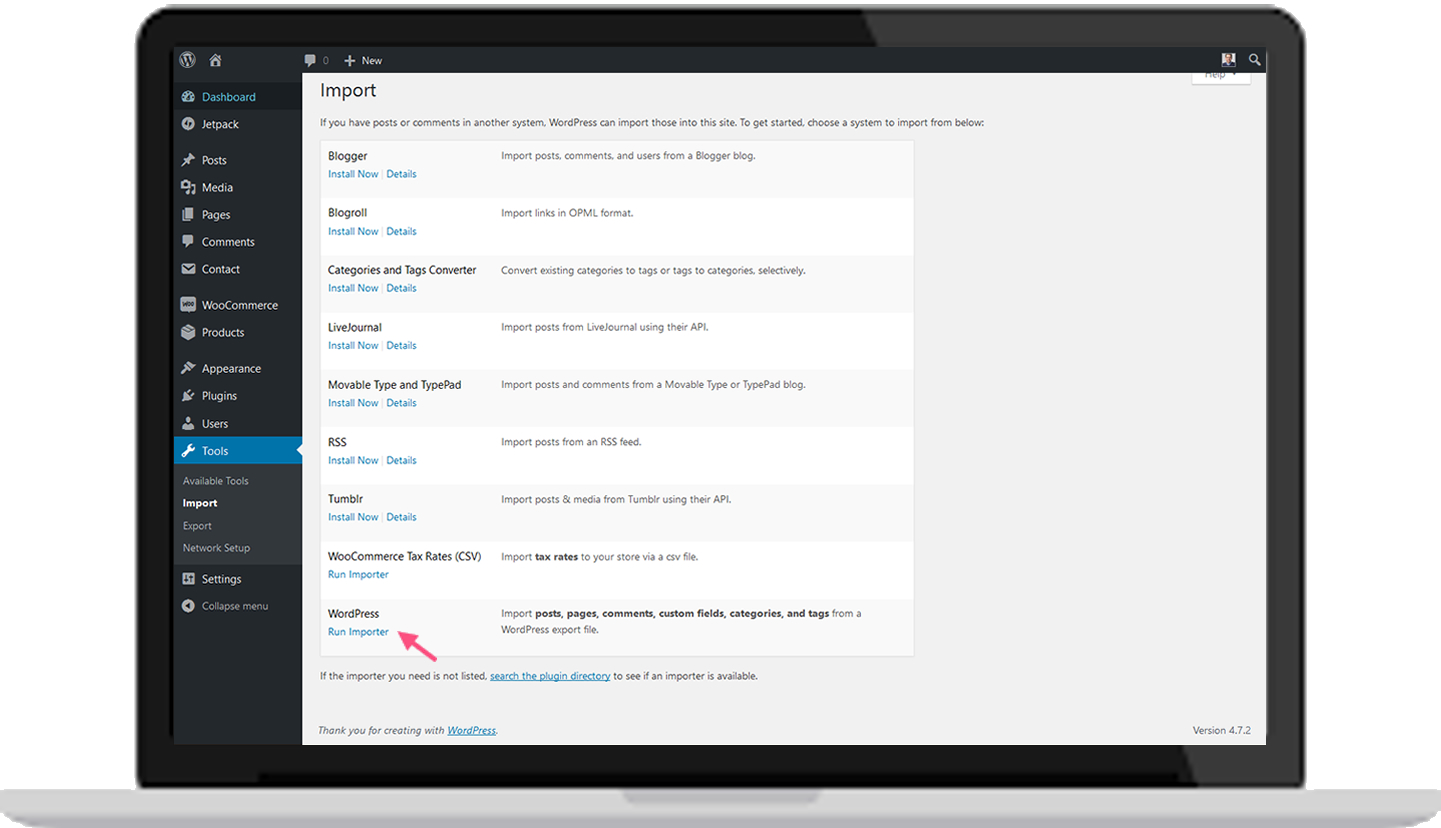 Image: WordPress – Tools
Once that’s installed select Run Importer, Choose file, and select the dummy-data.xml file you downloaded earlier.
You’ll then have the option to import a default author, create a new user, or assign the posts to an existing user. This is your decision to make, although we’d recommend assigning the posts to an existing user.
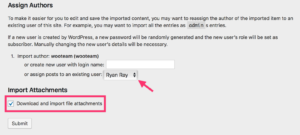
After that be sure to check or uncheck the Download and import file attachments checkbox, because this will import all the sample product images to your site if checked.
Click Submit and your dummy data will be imported. Congrats, you now have some sample data in WooCommerce to learn from!
6. Manage Multiple WordPress Installations
If you’d like to set up multiple online stores, or if you manage stores for multiple clients, then you should consider using Plesk Onyx to install and manage your all your WordPress installations. When you’re done, as in the screenshot below, you’ll see multiple sites in your WordPress installation list.
 Image: Plesk Onyx – Multiple WordPress Installations
The main benefit of using Plesk Onyx for multiple stores is the flexibility to set up, configure, update and secure one store, a set of stores, or all your stores at one go, including for tasks such as security scans, audits, and updates.
In fact, Plesk also allows you to schedule tasks to occur automatically, which we’ll be looking at in a later post.
7. Adding Additional Protection For Your Online Store
Security is as important a topic as ever, so it’s essential to keep track of the security touchpoints on your online store.
If you use Plesk, click Secure under Manage Plugins on your control panel to configure settings for:
- File and directory permissions
- Directory browsing permissions
- Security on the wp-contents and wp-includes folders
- Security keys
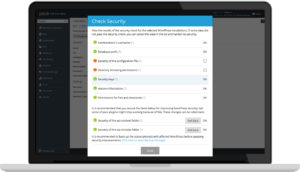 Image: Plesk Onyx – Check Security
For instance, you can see in the screenshot above that my Security of the configuration file and Directory browsing permissions on my WordPress installation are no longer up to date. To rectify that, all I’ll need to do on my Plesk control panel would be to check the checkboxes next to each of them and then click OK. Plesk will make the appropriate changes and add a green tick when complete.
Should I want to undo this action, I can click Rollback, which will reverse the changes and restore my original files and settings.
Do you need Plesk?
Now, do you really need Plesk Onyx and the Plesk WP Toolkit to set up your WooCommerce online store? Arguably, no. But I would argue that your time could be better spent managing and growing your business, than fiddling with technical updates and security settings.
Let me know what you think in the comments below. In the meantime, be well, do good, and stay Plesky!


2 Comments
Hi, is there any extra settings for WP-Super Cache when using with Woocommerce site? Like exclude cart and checkout pages from caching? Thanks
Very good question! When using a caching plugin for your WooCommerce site, make sure you exclude these pages from the cache:
These pages, as well as other elements like cart widgets, need to remain dynamic since they display information specific to the current customer.
There is actually a simple solution for the WP Super Cache. Just change the rules of the WP Super Cache plugin to not store cache for the shopping cart.
Go to Settings > Super Cache > Advanced from the WordPress menu item. Now add the part of the URL of the Shopping Cart page like this:
Add here strings (not a filename) that forces a page not to be…
Once your done just click the ‘Save Strings‘ button in order to keep your changes. WP-Cache will search if that string is part of the URI and if so, it will not cache that page.