The time of collecting and storing data about your website visitors without restrictions or oversight is now in the past. Today, few are willing to risk the hefty sum for violating the rules governing access to personal data instituted by the European Union and known as General Data Protection Regulation (GDPR).
Today, we are going to focus on one aspect of GDPR, namely, the rules governing the use of cookies. More specifically, we are going to look at how you can set up a Cookie Consent Banner for your sites.
Considering the amount of data routinely stored in cookie files, under certain circumstances, they may be considered personal data and thus fall under the purview of GDPR. So, in order to make sure that your website’s cookie consent banner is watertight, let’s read on.
A Good Start: Review your cookies
To start off, review the cookies your website uses and separate them into categories. This will help you decide which cookies can or cannot be saved on a user’s device without their consent.
Overall, the easiest way to add a GDPR-compliant cookie consent banner to your website is to use one of the many third-party services, for example, Cookie Script, Cookiefirst, and many others. The downside of this approach is that you entrust the matter of GDPR compliance to a third party, having little control over the implementation while bearing all the responsibility. This may result in a nasty surprise – like the one received by CookieBot users in Germany after Wiesbaden Administrative Court’s ruling.
Creating cookie consent in an online service
Moving on, let’s walk through the steps of creating a cookie consent banner for your website using a third-party online service. We’re going to use CookieYes as an example, but the steps listed here should be applicable to most similar services.
The CookieYes landing page boasts that the service enables anyone to create a cookie consent banner in three easy steps. Let’s put that to the test. As an aside, look at the bottom of the page – you will see CookieYes own cookie consent banner, which is what your banner created using this service will look like.

The first step is to create a free account. At this step, you also need to provide the domain name of the website you want to add a cookie consent banner.

You will soon receive two emails at the address you specified when signing up for the service – one asking you to verify your email, another thanking you for using CookieYes. After a short while, a third email will arrive, informing you that the cookie files employed by the website in question have been scanned correctly.
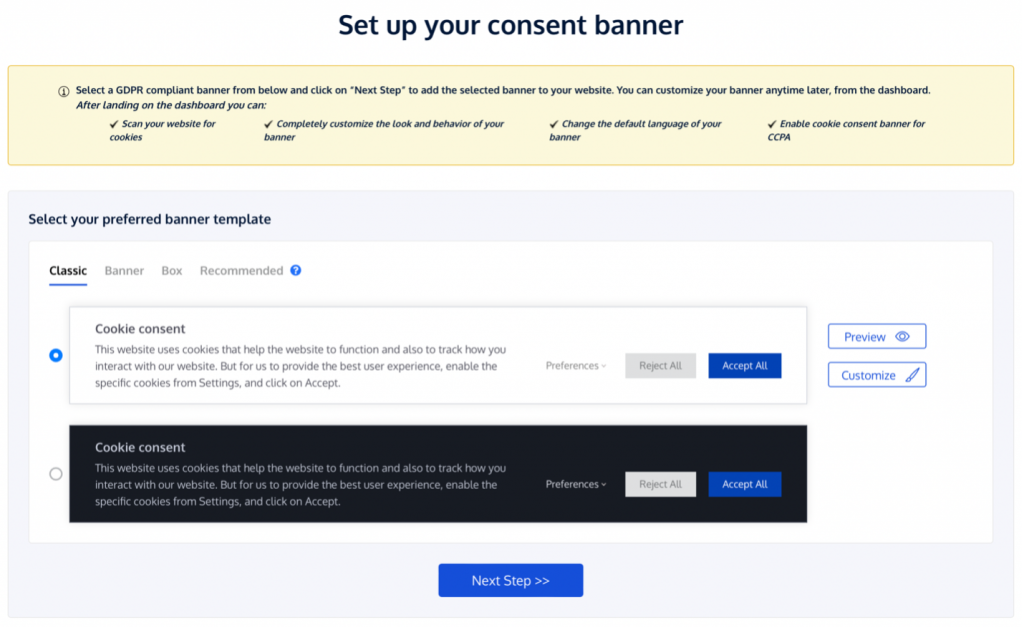
During the next step, you will be asked to choose and customize the appearance of your future cookie consent banner. Click Customize to proceed.
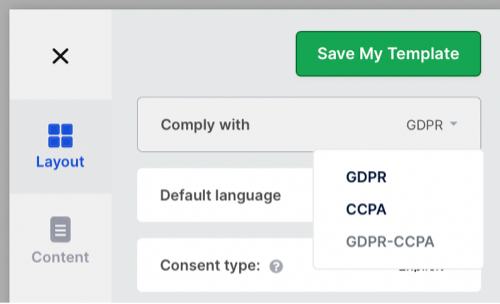
Don’t be shy – make sure that your future cookie consent banner looks precisely the way you want it to. Here you can also specify which regulations (GDPR, CCPA, or both) your banner must comply with, together with the consent type.
By default, the GDPR-compliant “Explicit” consent type is selected.
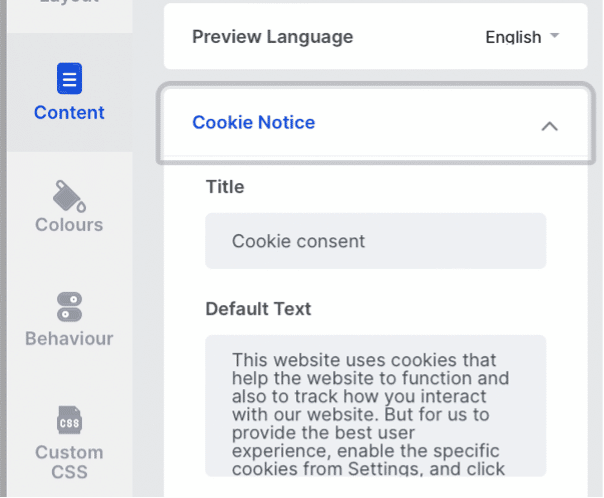
On the next tab, you can simply type or paste your own Cookie Notice and Privacy Policy text if the default ones do not suit you.
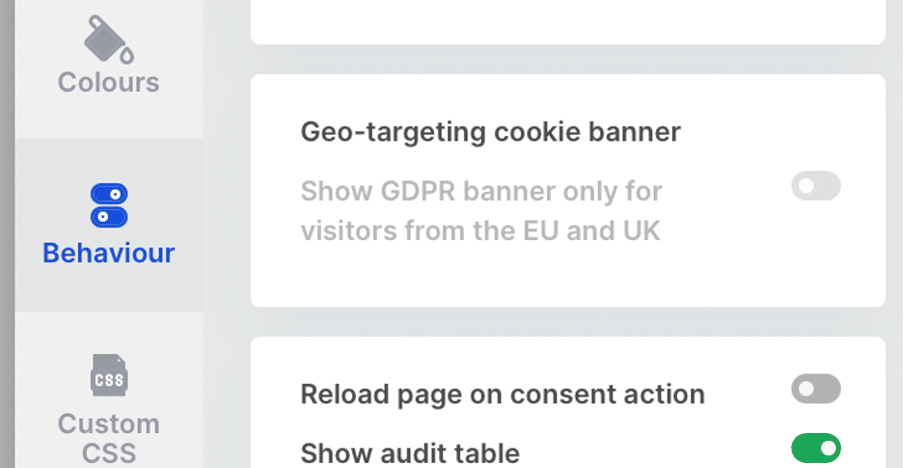
On the “Behaviour” tab, you can enable Geo-targeting – if you do, only visitors from the EU and UK will see your cookie consent banner. Regrettably, this feature is only available if you are paying for a “Pro” or “Ultimate” CookieYes subscription.
As you are customizing your banner, you can use the buttons at the bottom of the screen to see how your banner would look on a desktop, tablet, or mobile. Use this feature to make sure that the changes you make do not cause the banner to look awkward on any given platform.
Once satisfied, click Save My Template, select your template from the “My Templates” menu, and then click the green Next Step >> button to go to the next step, where you will learn how to add your banner to your website.
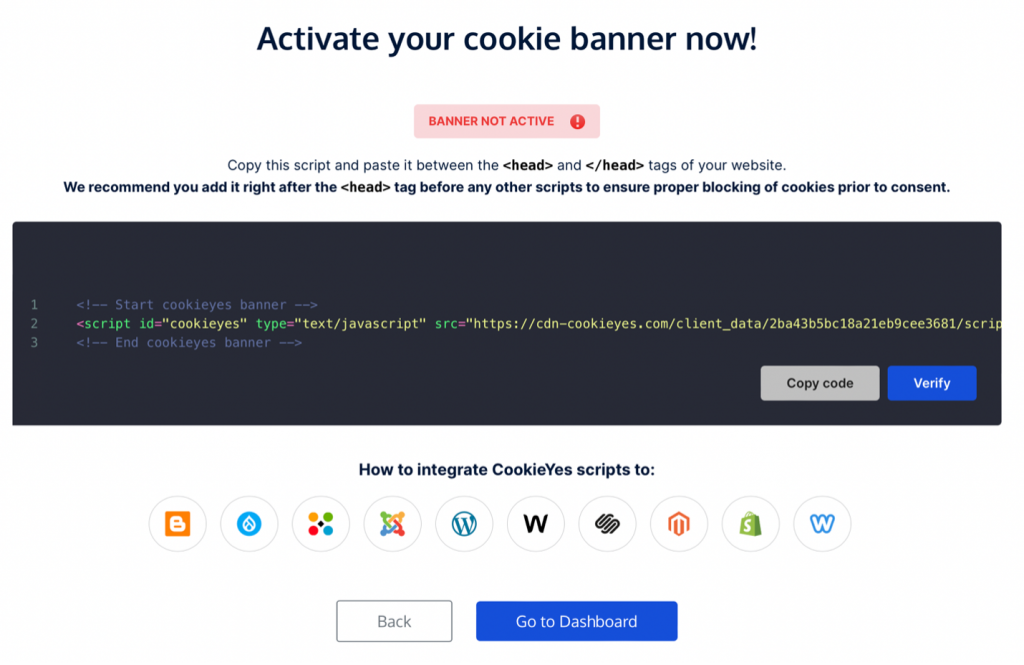
If your website is built on WordPress, Drupal, Joomla, Wix, Magento, Shopify, or one of the other popular CMS supported by CookieYes, follow the on-screen instructions to add your cookie consent banner to your website.
For example, for WordPress, just add the activation code to the header.php file of the theme you’re using on your website (for example, httpdocs/wp-content/themes/noteblog/header.php) right before the closing </head> tag.
<!DOCTYPE html>
<html xmlns="http://www.w3.org/1999/xhtml" <?php language_attributes(); ?>>
<head>
  <meta charset="<?php bloginfo( 'charset' ); ?>" />
  <meta name="viewport" content="width=device-width" />
  <link rel="profile" href="http://gmpg.org/xfn/11" />
  <link rel="pingback" href="<?php bloginfo( 'pingback_url' ); ?>" />

<?php wp_head(); ?>
<!-- Start cookieyes banner -->
    <script id="cookieyes" type="text/javascript" src="https://cdn-
    cookieyes.com/client_data/2ba43b5bc18xxxxxxxxxx/script.js"></script>
 <!-- End cookieyes banner -->
</head>
You can do it using the Code Editor that comes with File Manager in Plesk. Once your banner has been activated, you can manage it from your dashboard.
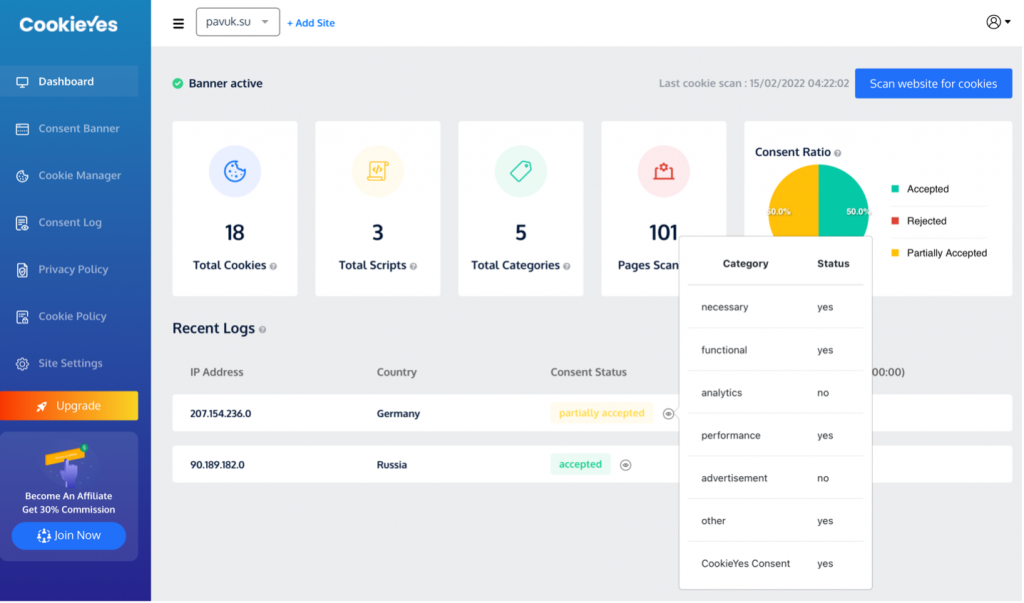
Use the “Consent Banner” menu to further customize your cookie consent banner – the tools here are the same as those you used during your banner’s creation.
In the “Cookie Manager” menu, you can quickly scan your website for cookies, separate cookies into categories (such as “necessary,” “analytics,” or “advertisement”), and even add, remove, or edit cookies going forward.
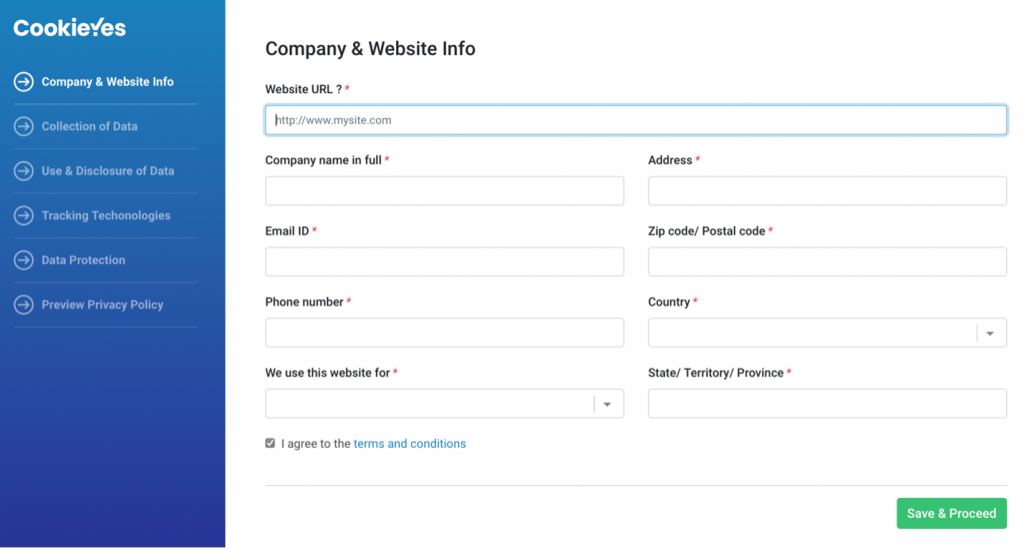
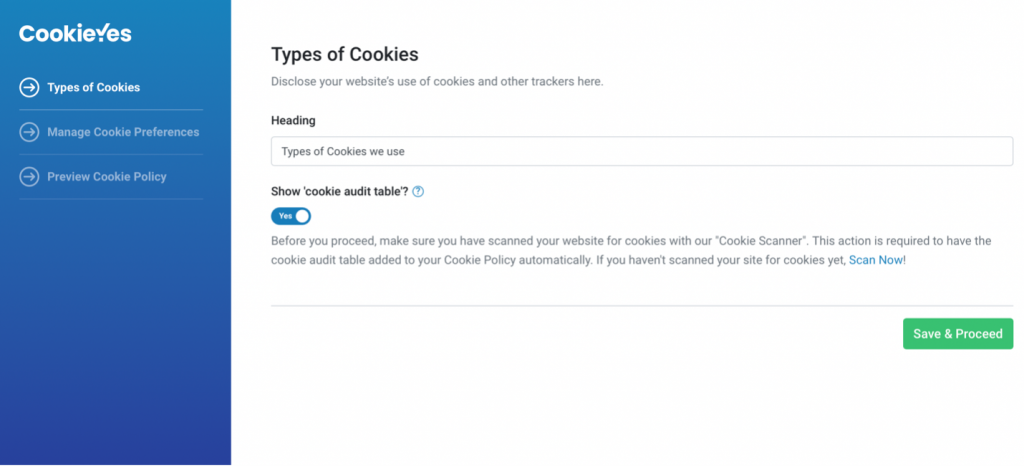
You can find a similar wizard for creating your Cookie Policy in the eponymous menu.
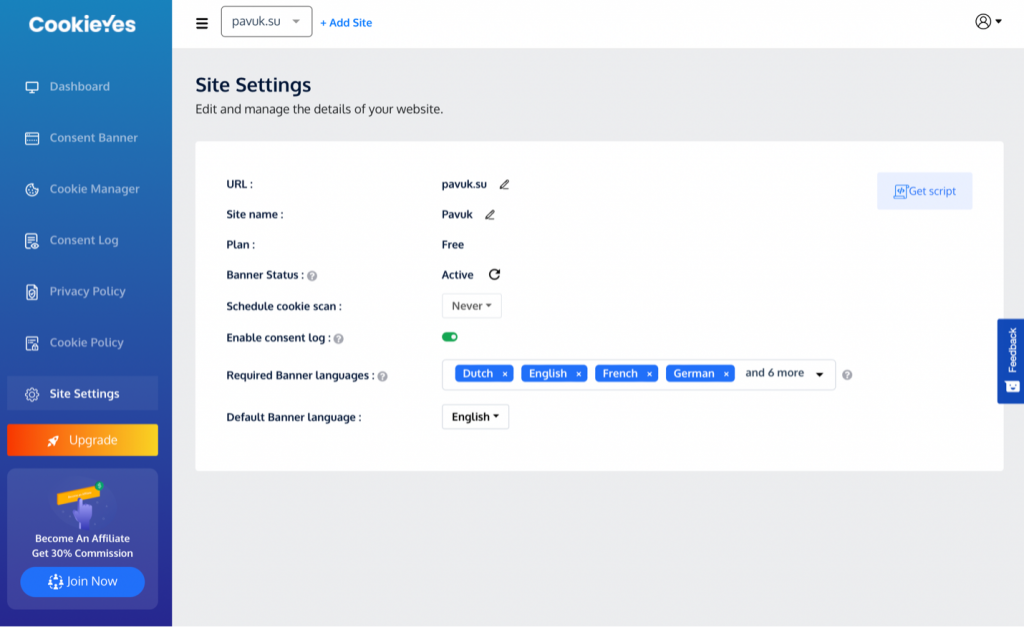
Finally, from the “Site Settings” menu, you can manage and edit your website settings. I strongly recommend enabling a consent log – it can be a lifesaver during a stressful audit.
If you are running a WordPress website, feel free to use the top-rated official CookieYes plugin. Have no fear – at the time of writing, the plugin has been installed over a million times! It is updated regularly and comes with a comprehensive video tutorial. Simply install the plugin from your WordPress administrator dashboard, and you’ll have access to all the tools necessary for managing your cookie consent banner.
Conclusion
In conclusion, setting up a cookie consent banner for your website using tools available online is quite simple. You can easily fine-tune your banner (for example, make it so that it is only shown to visitors from the EU and UK) to suit your every need.
If you’d also like to learn more about different theoretical aspects of cookie use in view of GDPR and ePrivacy Directive, we recommend having a look at, Following GDPR Cookie Regulations on Your Sites.


No comment yet, add your voice below!