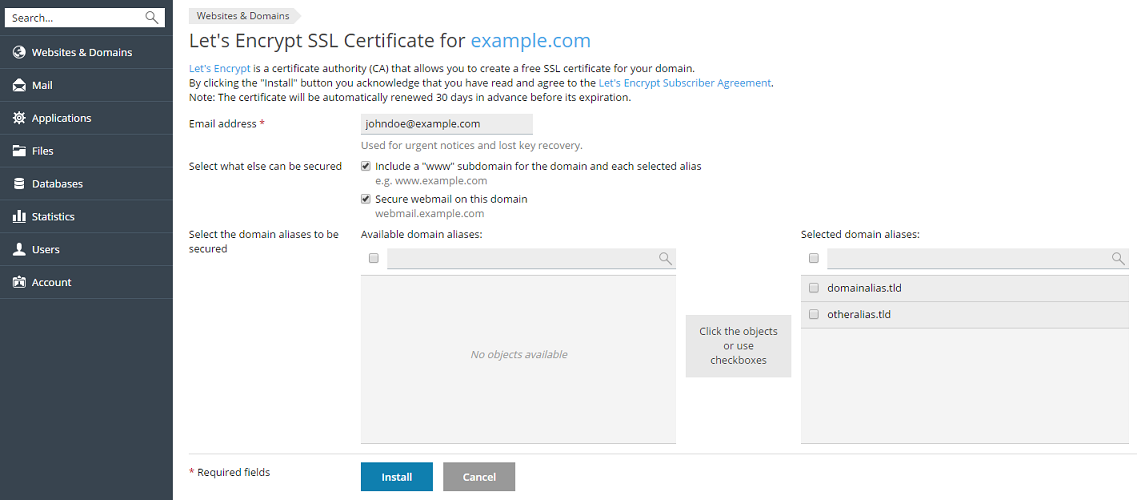
Note: This topic describes the old procedure present in Plesk Onyx.
Go to the new one offered by the SSL It! extension in Plesk Obsidian.
If the Let’s Encrypt extension is installed in Plesk, you can get a
free certificate for your domain from the Let’s
Encrypt Certificate Authority and use this
certificate to secure your domain, webmail and a “www” subdomain for the
domain and each selected alias.
To get a free SSL/TLS certificate from Let’s Encrypt:
-
Go to Websites & Domains > Let’s Encrypt.
-
Specify the email address that will be used for urgent notices and
lost key recovery. By default, the email address of the subscription
owner is used. -
Specify if you want to include an alternative domain name for the
domain and each selected alias, for example:www.example.comfor
example.com. We recommend that you select this checkbox. -
Specify if you want to include webmail, for
example:webmail.example.com. We recommend that you select this
checkbox. -
If there are domain aliases, select the ones that you want to include
in the certificate. -
Click Install to get and install the Let’s Encrypt certificate
for the subscription.
Now that the certificate has been installed, you may use it to secure
your site:
- Go to Websites & Domains and click Hosting Settings.
- Select the Let’s Encrypt certificate you have just received from the
Certificate menu and then click OK.


