If you want to select specific Plesk components for installation, you
can install Plesk using the interactive console. Follow these steps to
begin:
-
Log in to the server via RDP.
-
Download Plesk
Installer. -
Launch the Windows command prompt. Change the working directory to
the one in which you saved the installer binary, then run the
following command:plesk-installer.exe --console
This will launch the console in the command prompt window.
If you want to install an earlier version of Plesk, run:
plesk-installer.exe --console --all-versions
If you prefer to use a graphical interface for installation, see the
Installer GUI topic.
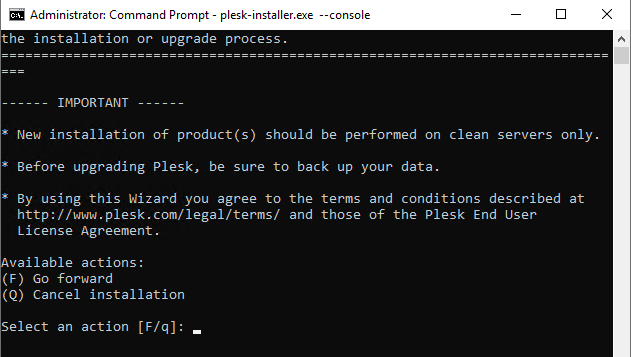
Read the text marked with “IMPORTANT”, then type F in the
command prompt and hit the Enter key to proceed.
Next, you need to select which version of Plesk to install.
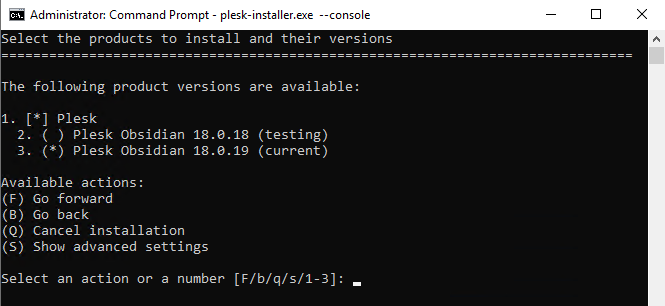
If you ran the installer with the --all-versions
option, the list of available Plesk versions will be different.
Here you can also see how to specify a number of advanced settings
by typing S:
- The directory to which the installer will download files.
- The source of the installation files. By default, they are
downloaded from Plesk servers. However, you may want to install from
a different server (for example, if you have set up a local
mirror), or from the local disk (if you have
downloaded the installation files beforehand). - The proxy server address and, if required,
username and password (if you are installing Plesk on a server behind an HTTP proxy), and so…